
ReShade Guide for VaM
Home (reshade.me)
Ray Tracing and Depth Buffer
Now, do understand that this form of ray tracing isn’t on the same scale as Cyberpunk as it isn’t using engine data and can only use data that is currently viewed in your window or “screen space” if you will. I found this video below explains pretty well how it works. Regardless, it can still look pretty good in most cases and new updates to these RTGI effects improve the performance and speed.
Reshade RTGI vs 'real' Ray-Traced GI (youtube.com)
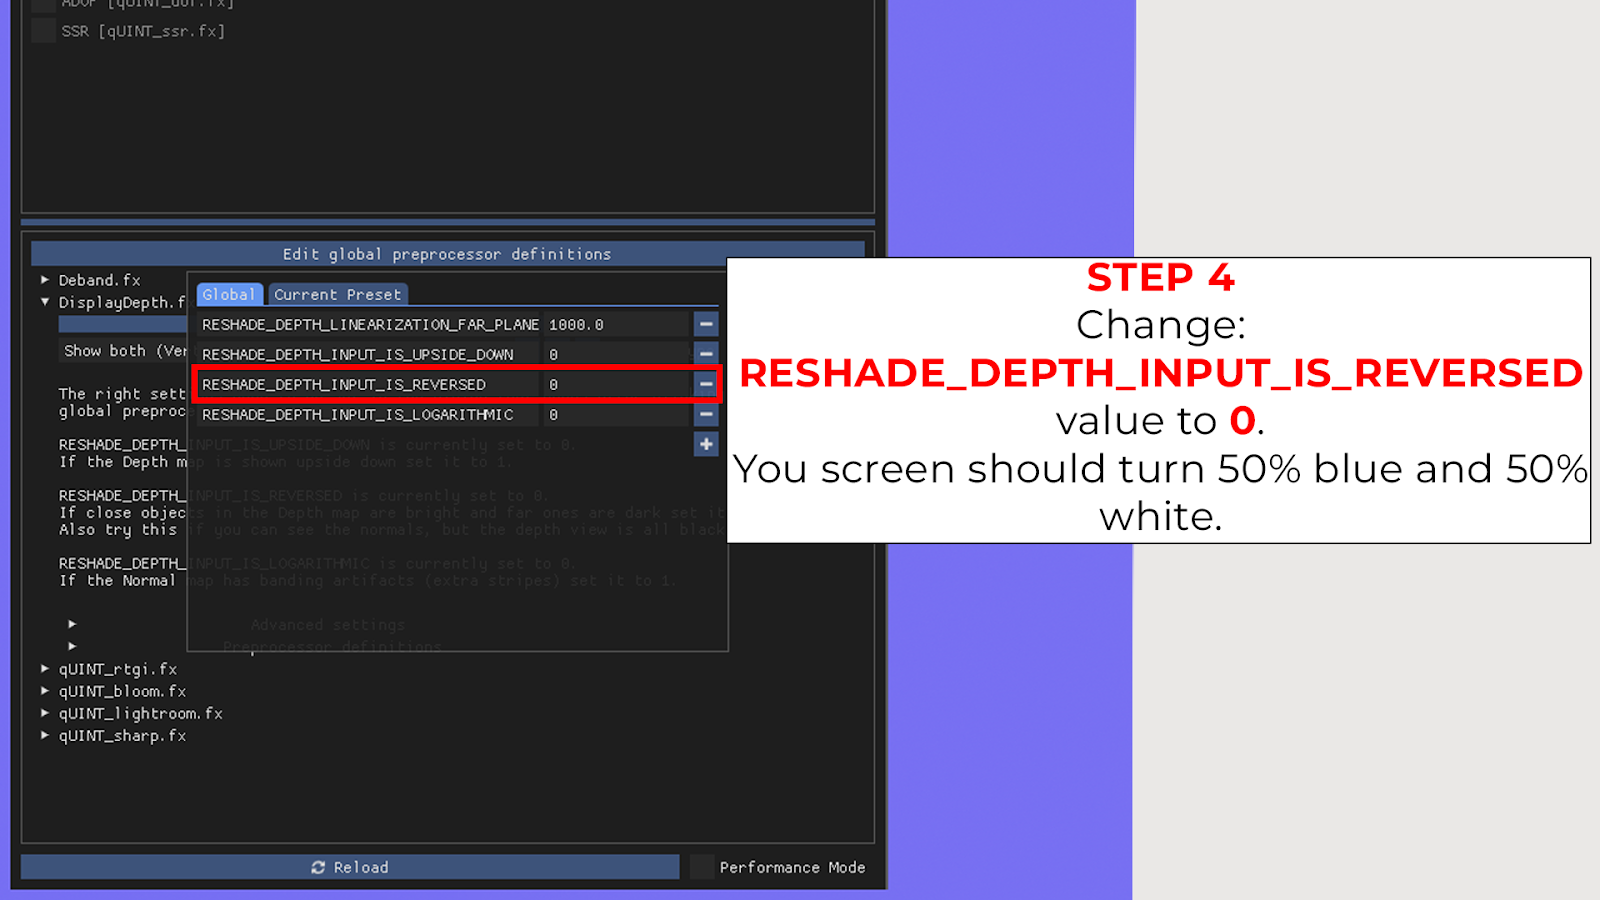
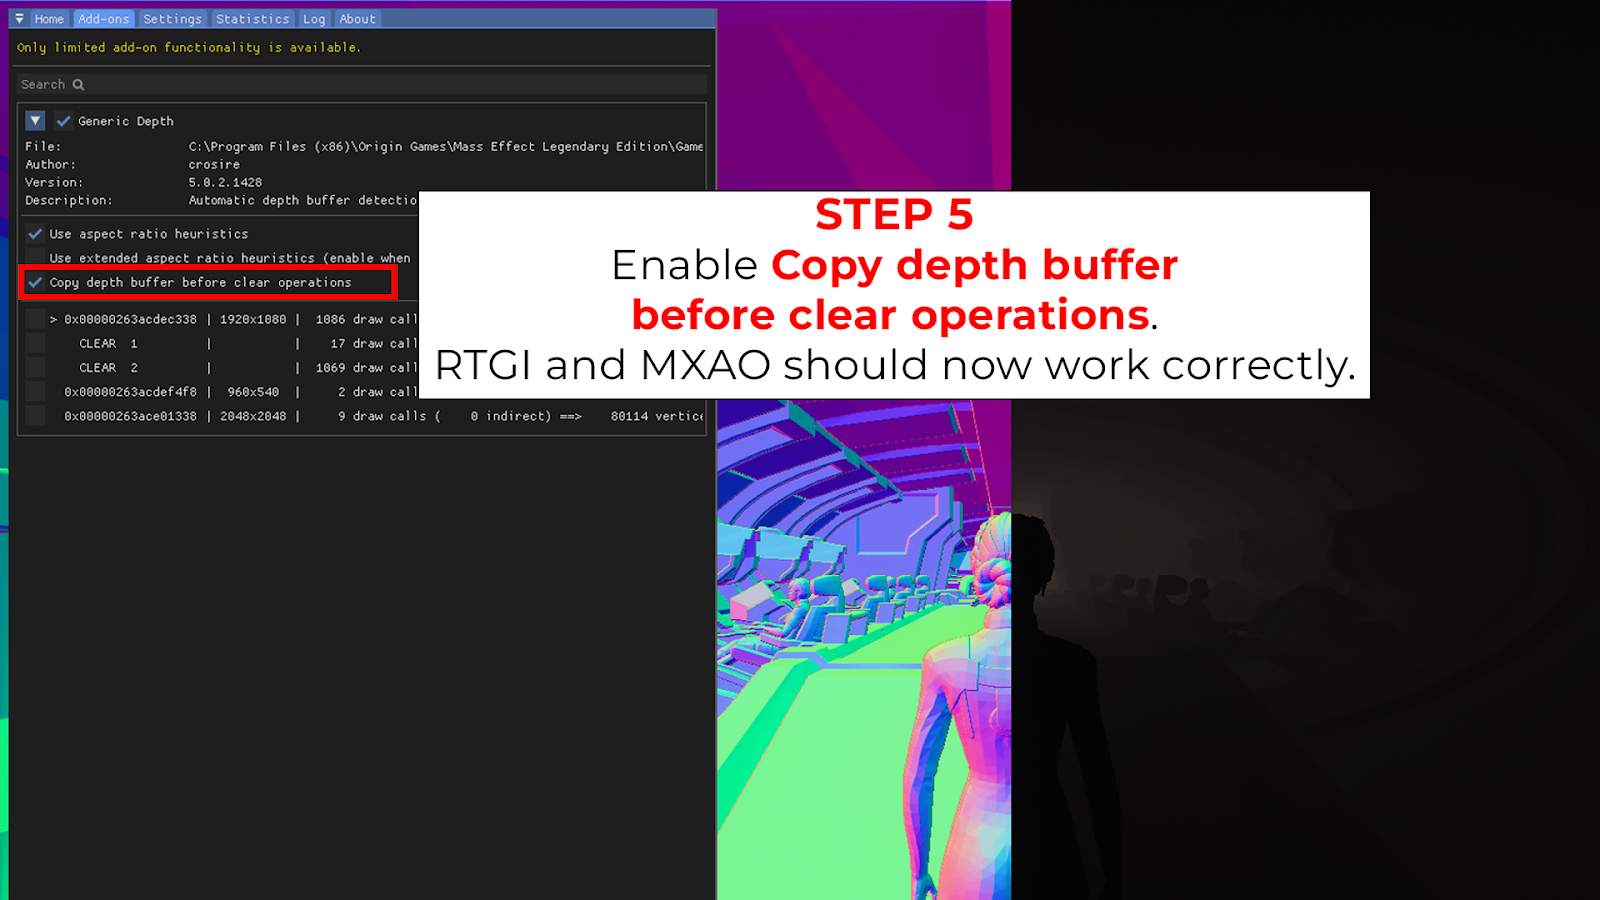
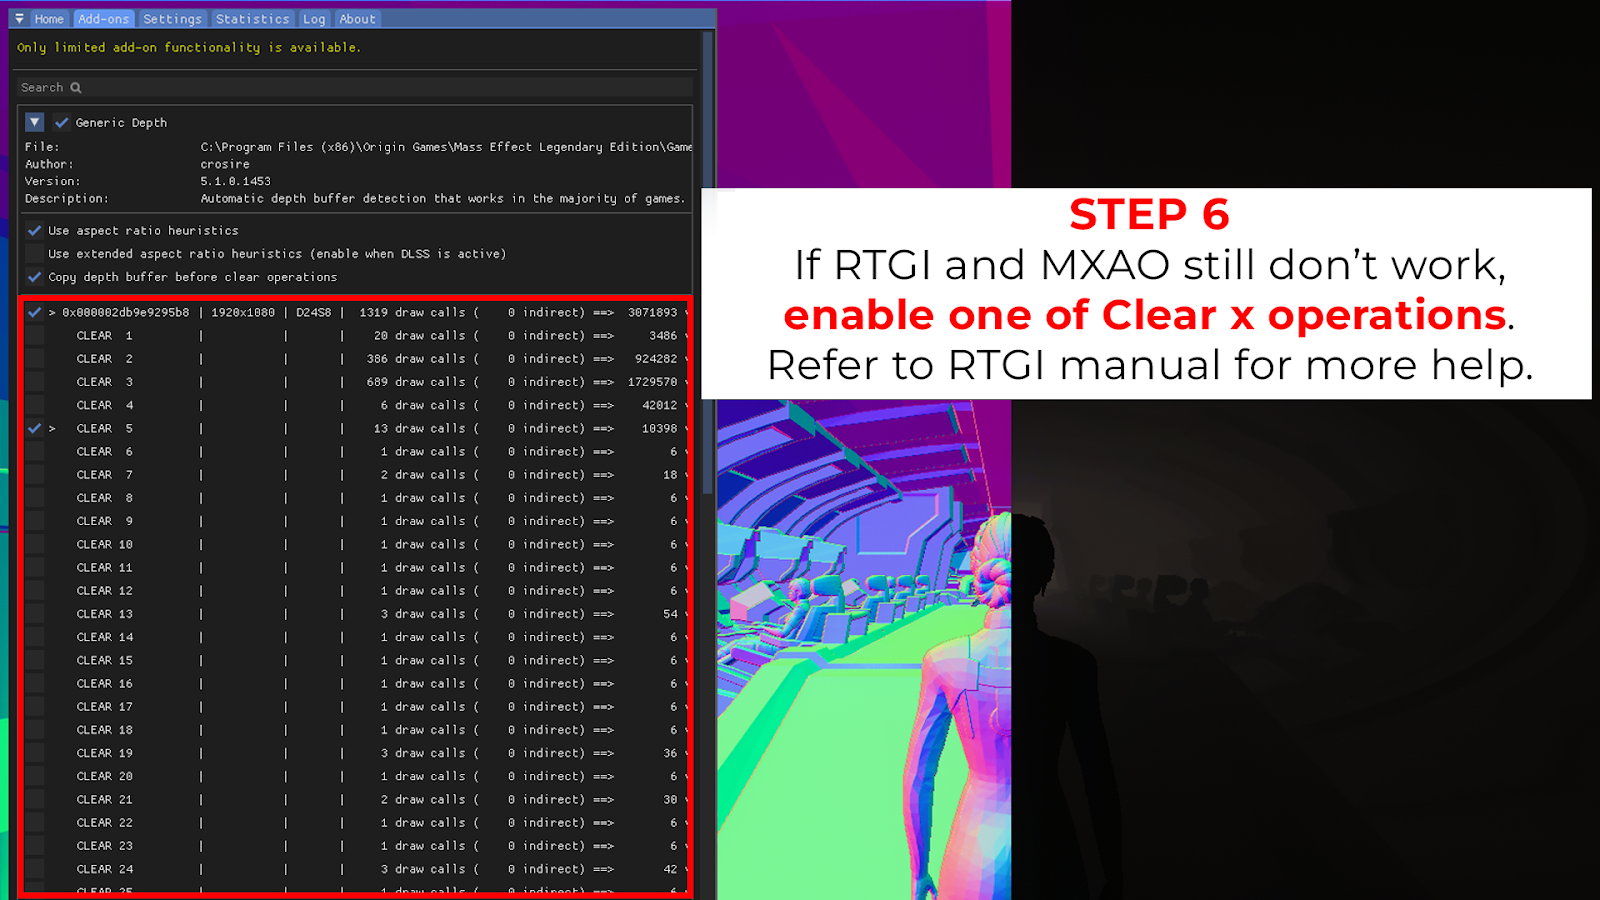
Before we discuss more about RTGI though, you will need to get the Depth Buffer corrected. The steps shown below should help you get it set correctly. I have also included my settings for you to try, but please understand this step can take a bit of trial and error. You may need to disable MSAA in your graphics settings temporarily but don’t worry as you can enable it again afterwards as MSAA usually doesn’t have an issue with Reshade anymore. The video linked above can also help with this step as it’s probably the hardest step in my opinion.
Achieving the depth buffer can differ from game to game, but in VaM it is reliant on the depth of field effect. You may use something like Post Magic with its built in DoF effect but I prefer to use CheesyDoF and it is bound to the F8 key and doesn’t conflict with scenes that might have post magic included. All you need to do is turn on the depth of field effect for 5-10 seconds, which should allow Reshade to read the depth buffer for VaM. I will show my Session Plugin list at the end of the guide in case anyone wants to use it. Once you have done that, try following the steps below.

The steps shown below should help explain further. Ideally, you will want your game to look like step 5 and 6, which will show your model in the background. If you only see gray/blue as shown in step 4, the depth buffer isn’t set up correctly and RTGI/MXAO won’t work.
RTGI Add-ons
Now that you have set up your depth buffer, it’s time to add RTGI to VaM. Unfortunately, these are paid addons but I will link their patreon pages below. If you want the full look that you see in all of the screenshots in the guide, you will need both RTGI implementations from NiceGuy and Marty McFly as my presets use effects from both. For the RTGI effect, we will only be using NiceGuy’s Complete RT as I find it looks just as good as Marty’s version, but actually runs a bit faster. A few Marty effects are non-RTGI related so they won’t conflict. You may be able to get away with only using NiceGuy and the free Marty effects on GitHub but it may end up looking slightly different.
NiceGuy | The Developer of NiceGuy Shaders and COMPLETE Shaders | Patreon
Pascal Gilcher | Creating the ReShade Ray Tracing shader (RTGI) and more | Patreon
GitHub - martymcmodding/METEOR: Marty's Extra Effects for ReShade
Once you have downloaded the files, it should be an easy drop-in to your already existing Reshade files in your VaM directory. Be on the lookout for duplicates as having two of the same effect in ReShade will cause it to show up twice in your effect list and will apply the effect twice which isn’t what we want.
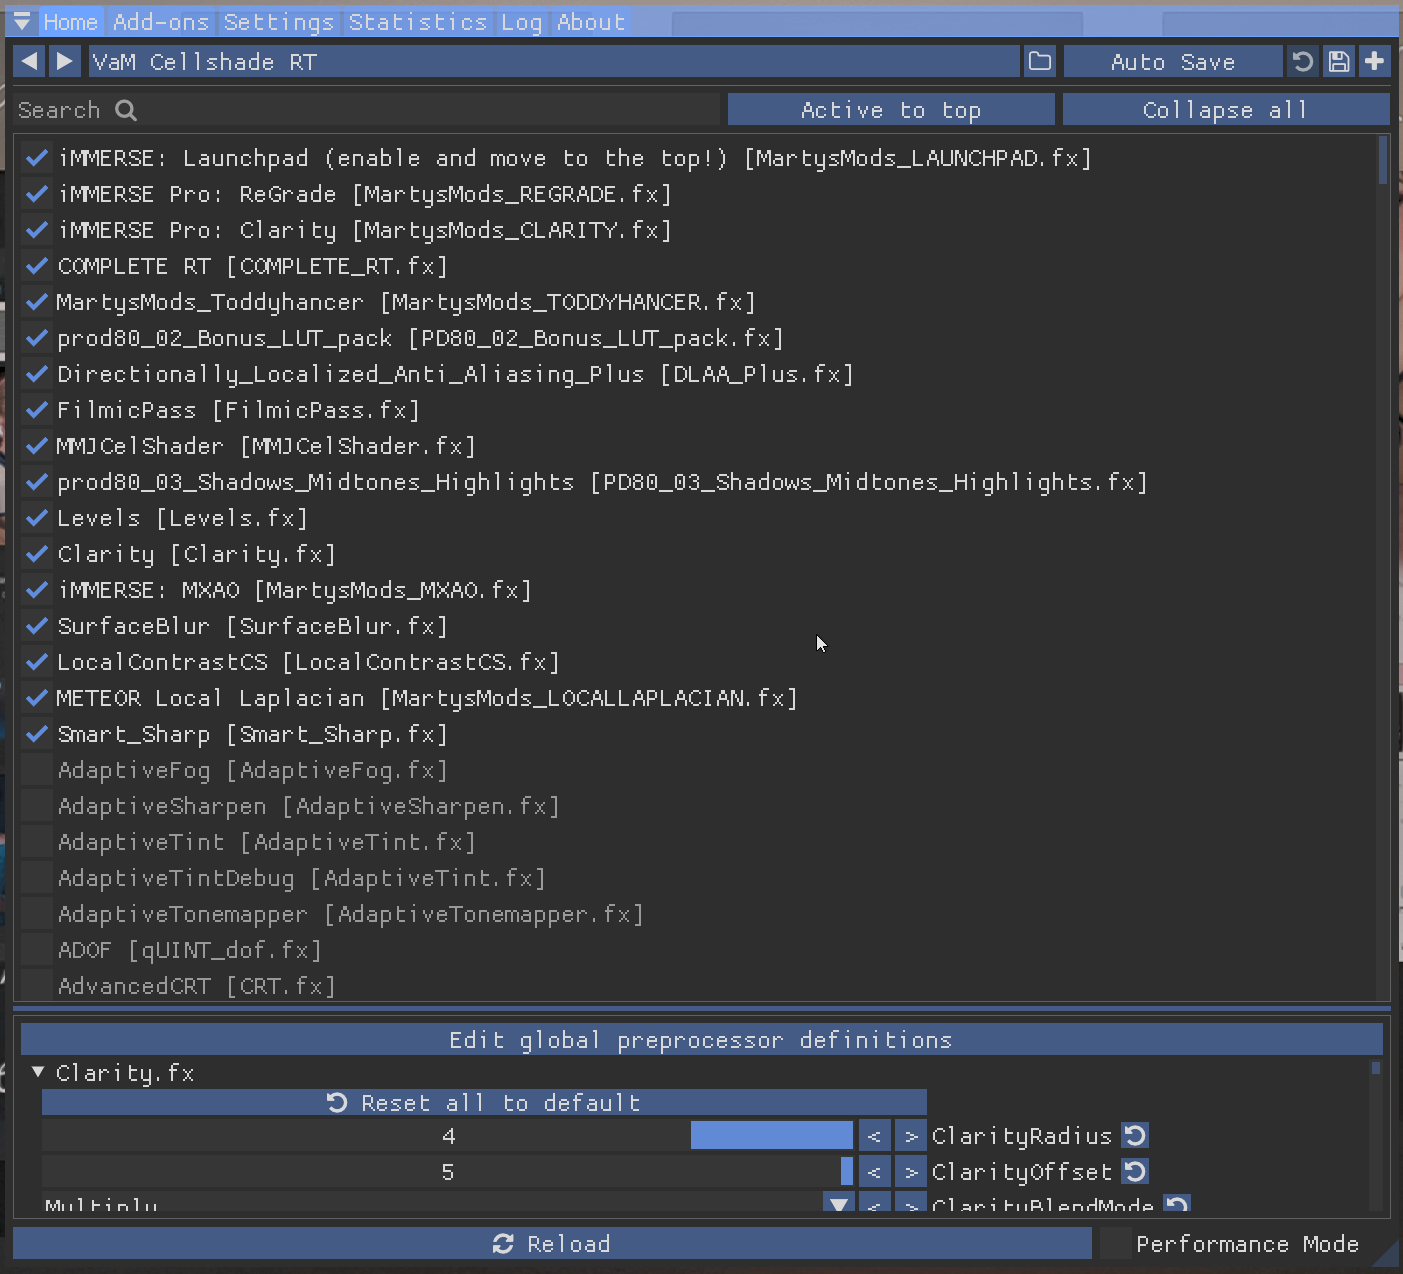
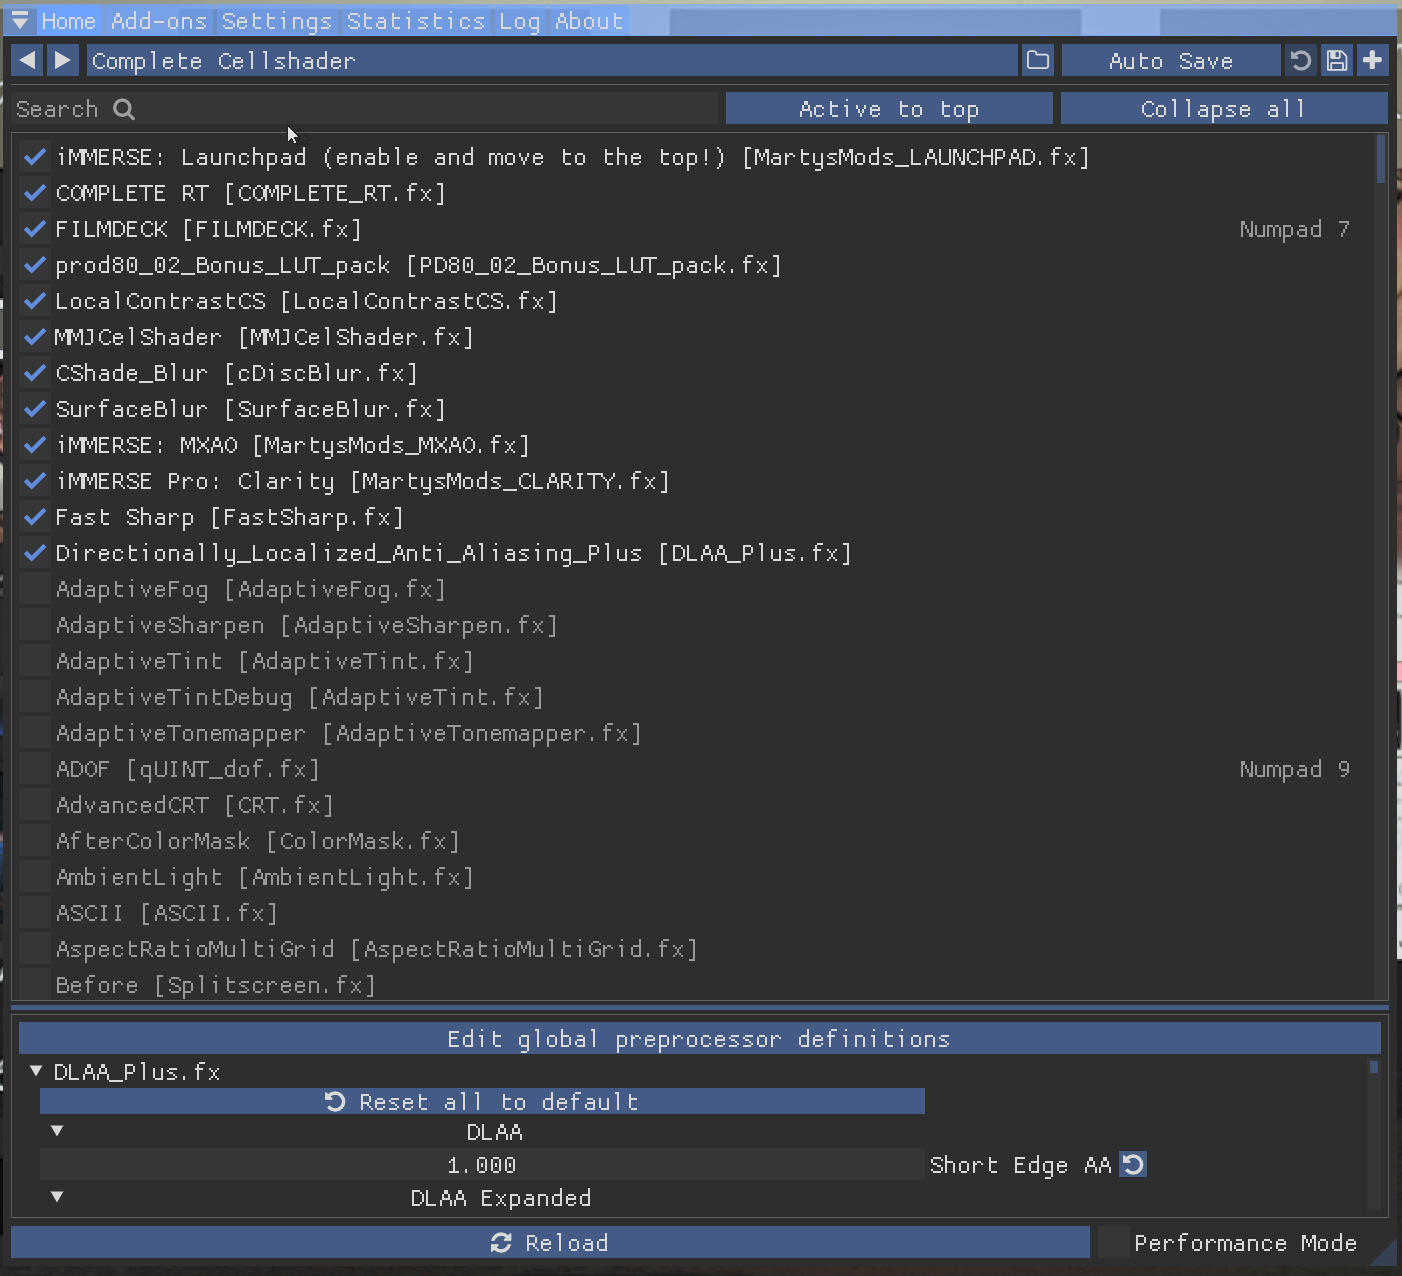
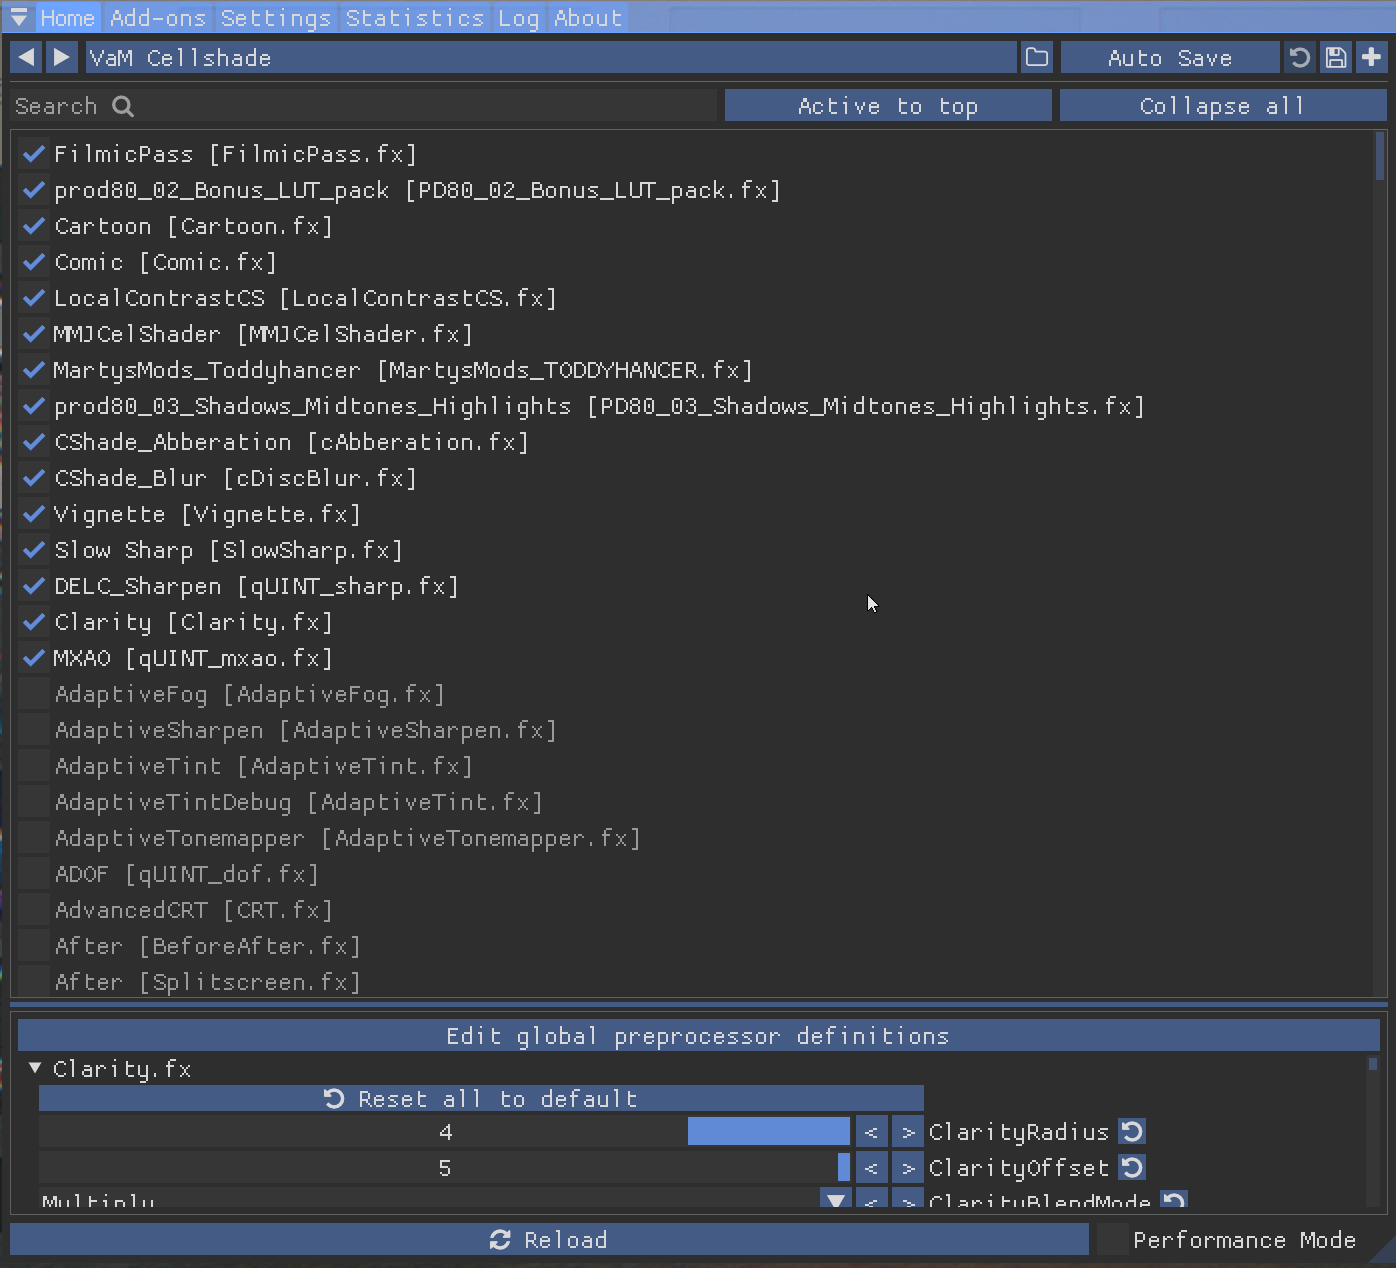
That’s all! If your ReShade preset list matches mine shown below, you should be good to go. If the depth buffer is working correctly, you will see a major difference in the shadows compared to default. Some effects work without the depth buffer so don’t assume everything is working just because some effects are. To finish up, I will post the preset lists, my go-to session plugins, my PC specs and a gallery of the presets in action. I know this guide isn’t perfect and may need some tuning but hopefully it will help you get things set up mostly.
ReShade Preset Lists
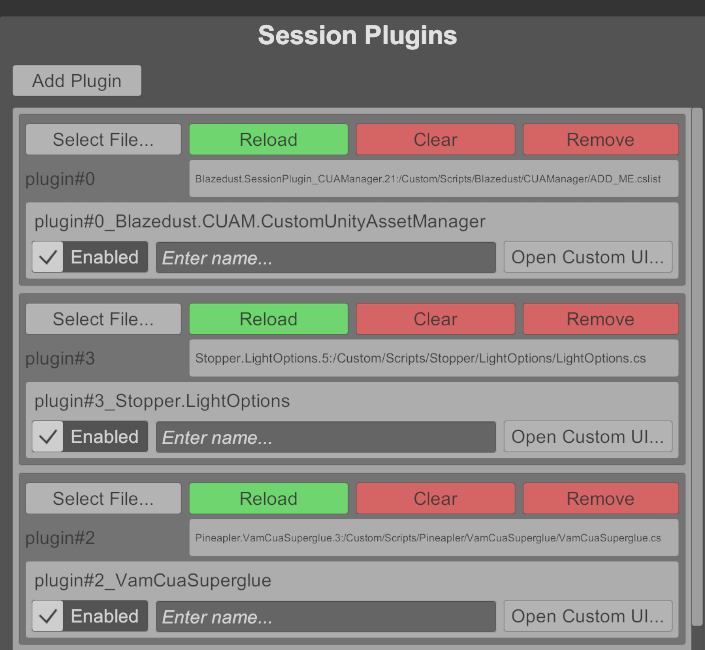
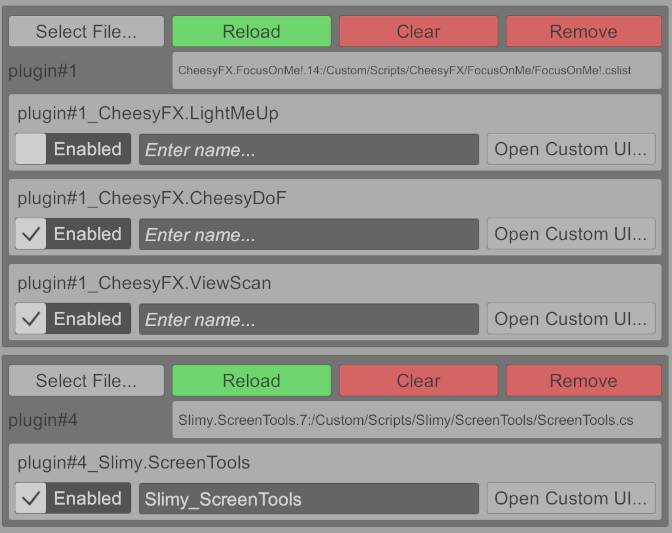
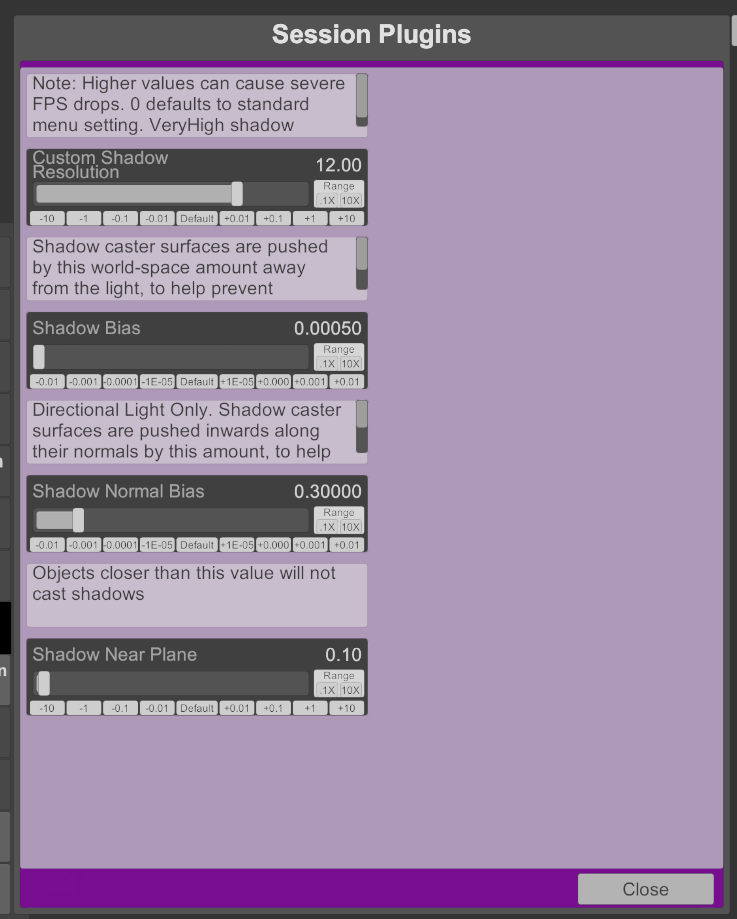
Session Plugins
Settings for Stopper Light Options
Links for plugins
(294) Plugins - CUAManager | Virt-A-Mate Hub (virtamate.com)
(294) Plugins - Light Options | Virt-A-Mate Hub (virtamate.com)
(294) Plugins - CUA Superglue | Virt-A-Mate Hub (virtamate.com)
(293) Plugins - FocusOnMe! | Virt-A-Mate Hub (virtamate.com)
(293) Plugins - ScreenTools | Virt-A-Mate Hub (virtamate.com)
PC Specs
CPU - Ryzen 7 5800X3D
GPU - RTX 4090
RAM - 64GB DDR4 3600MHz
Monitor - Alienware AW3423DWF
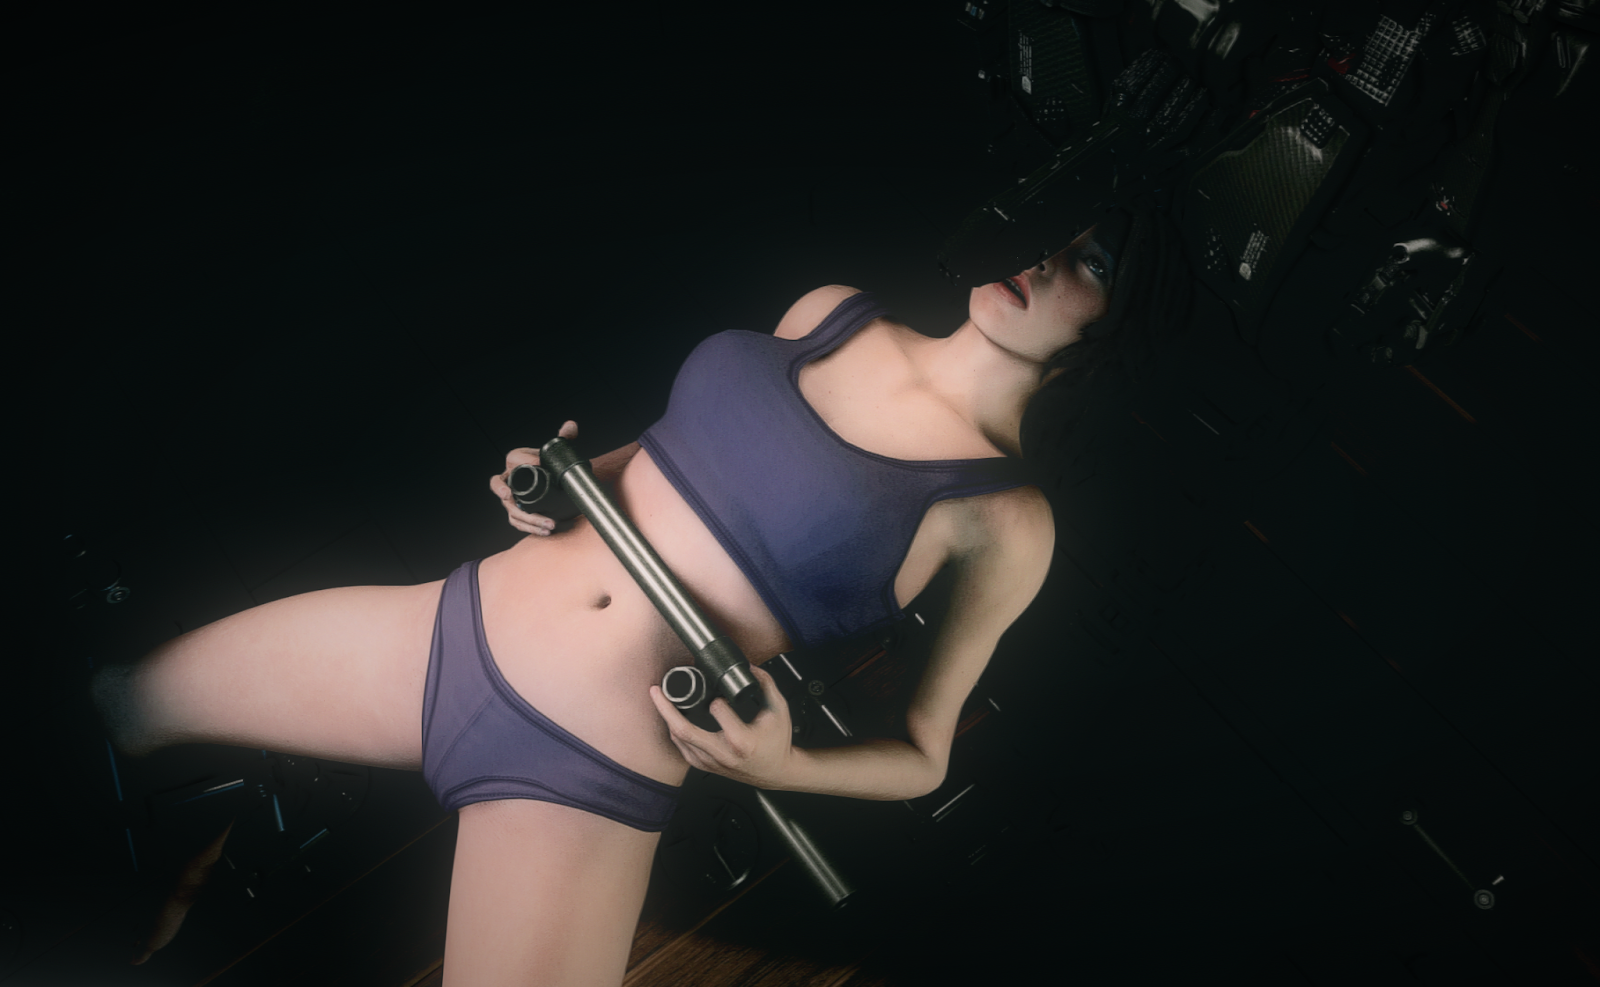
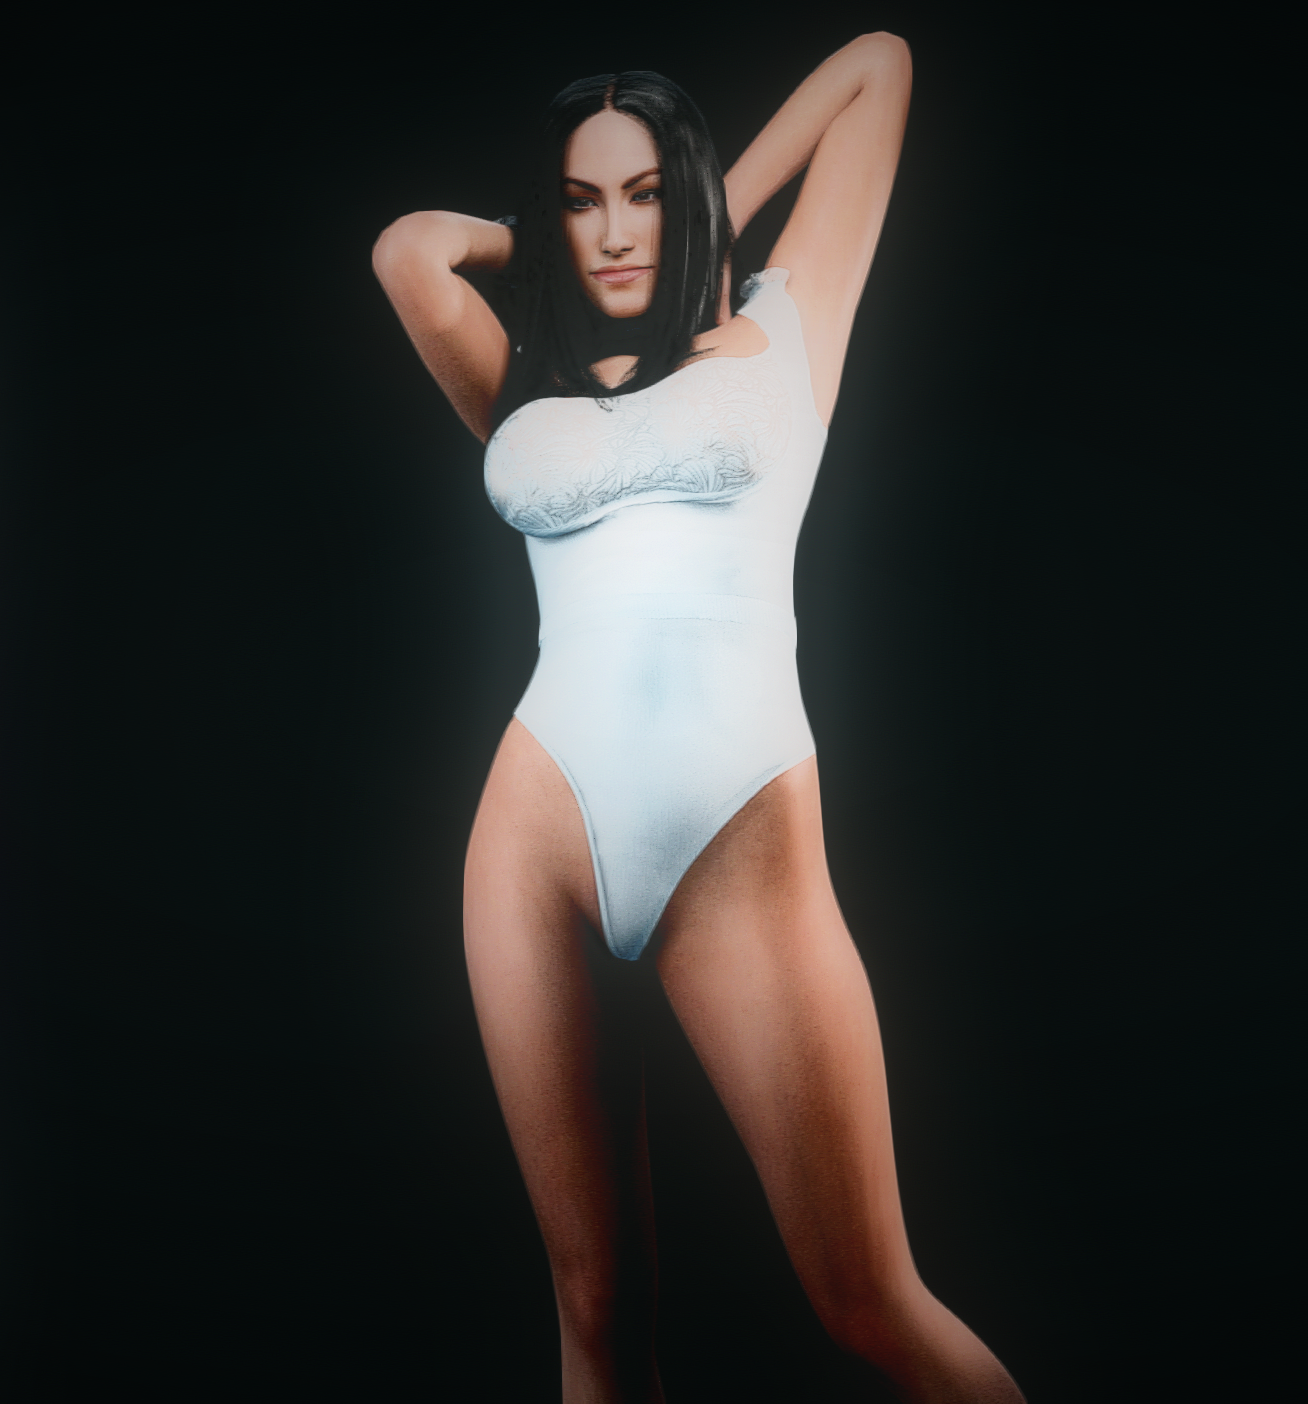
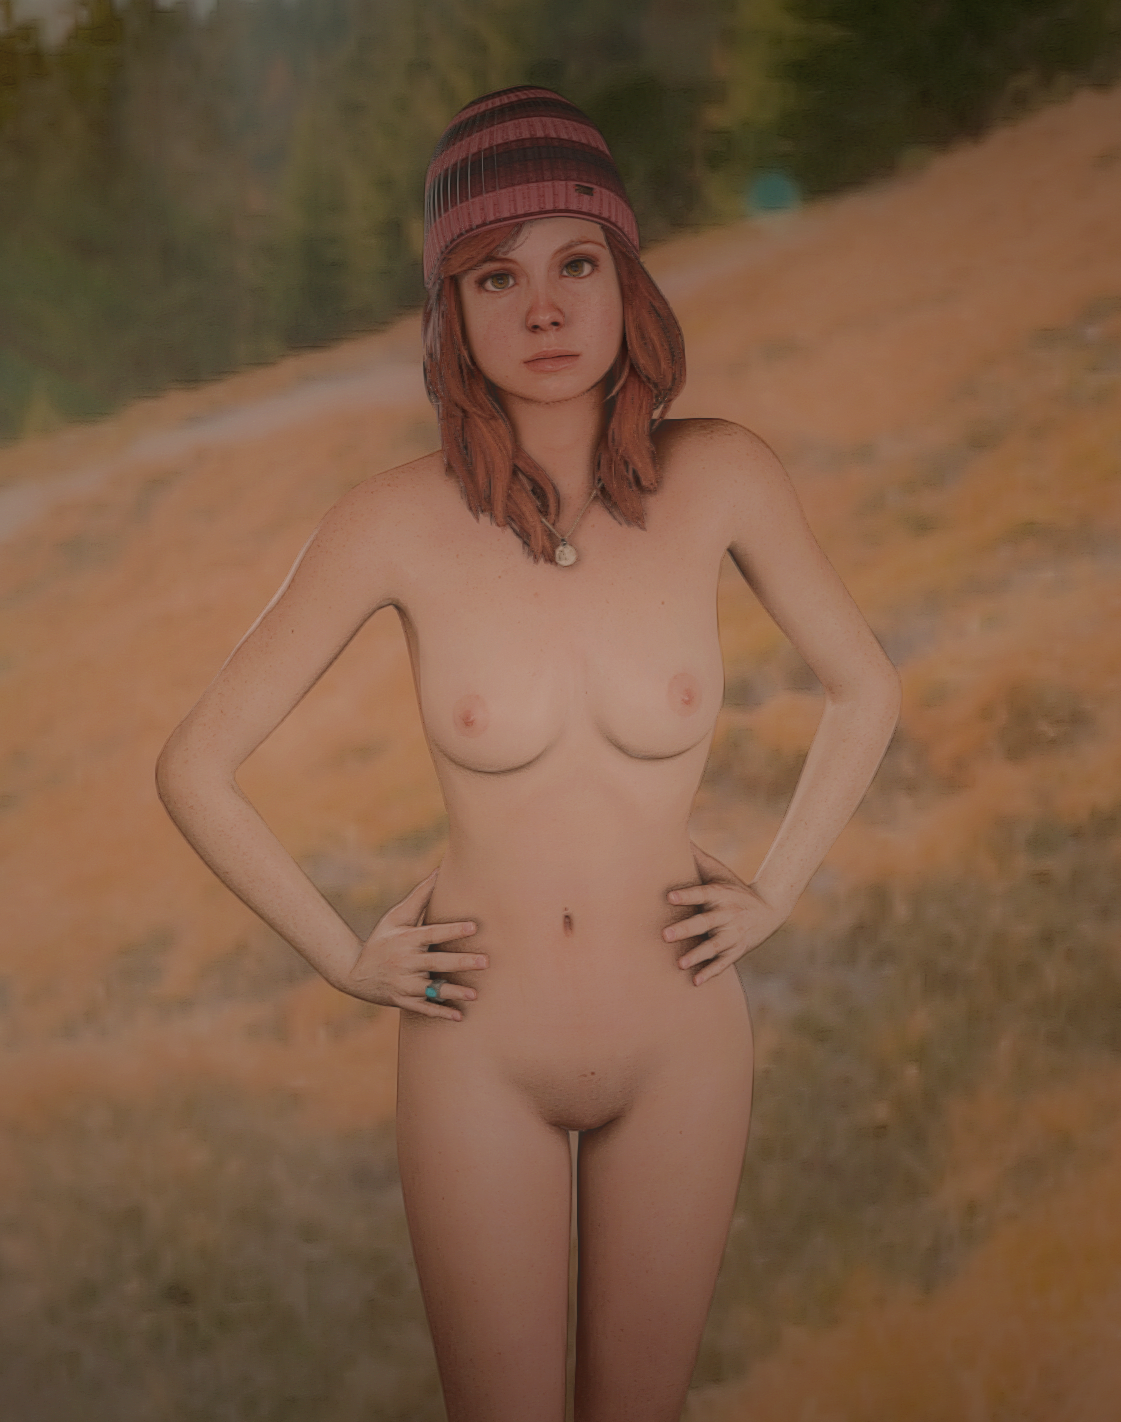
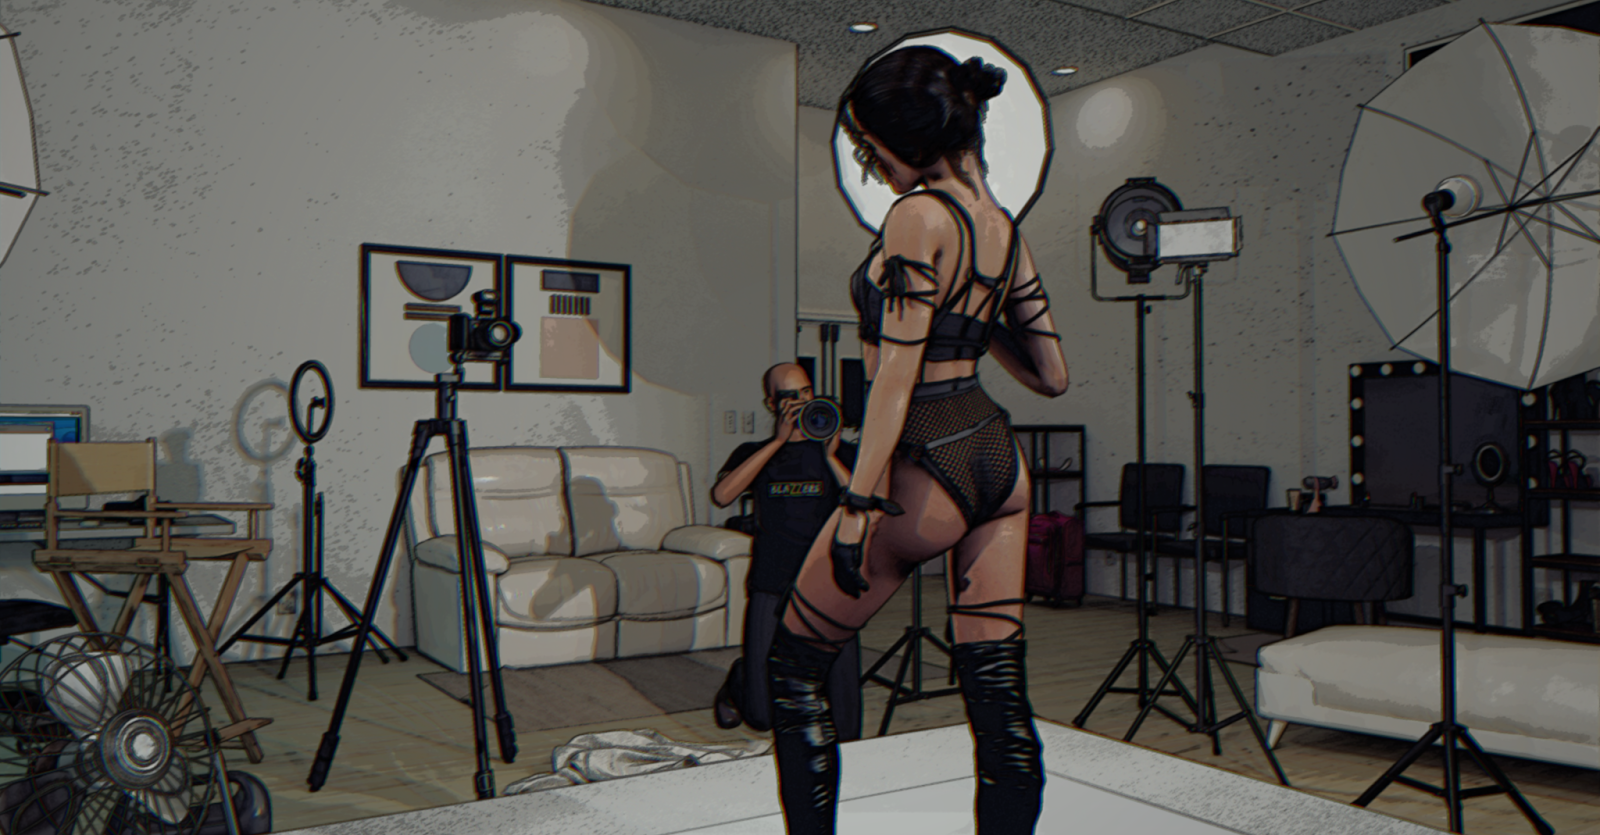
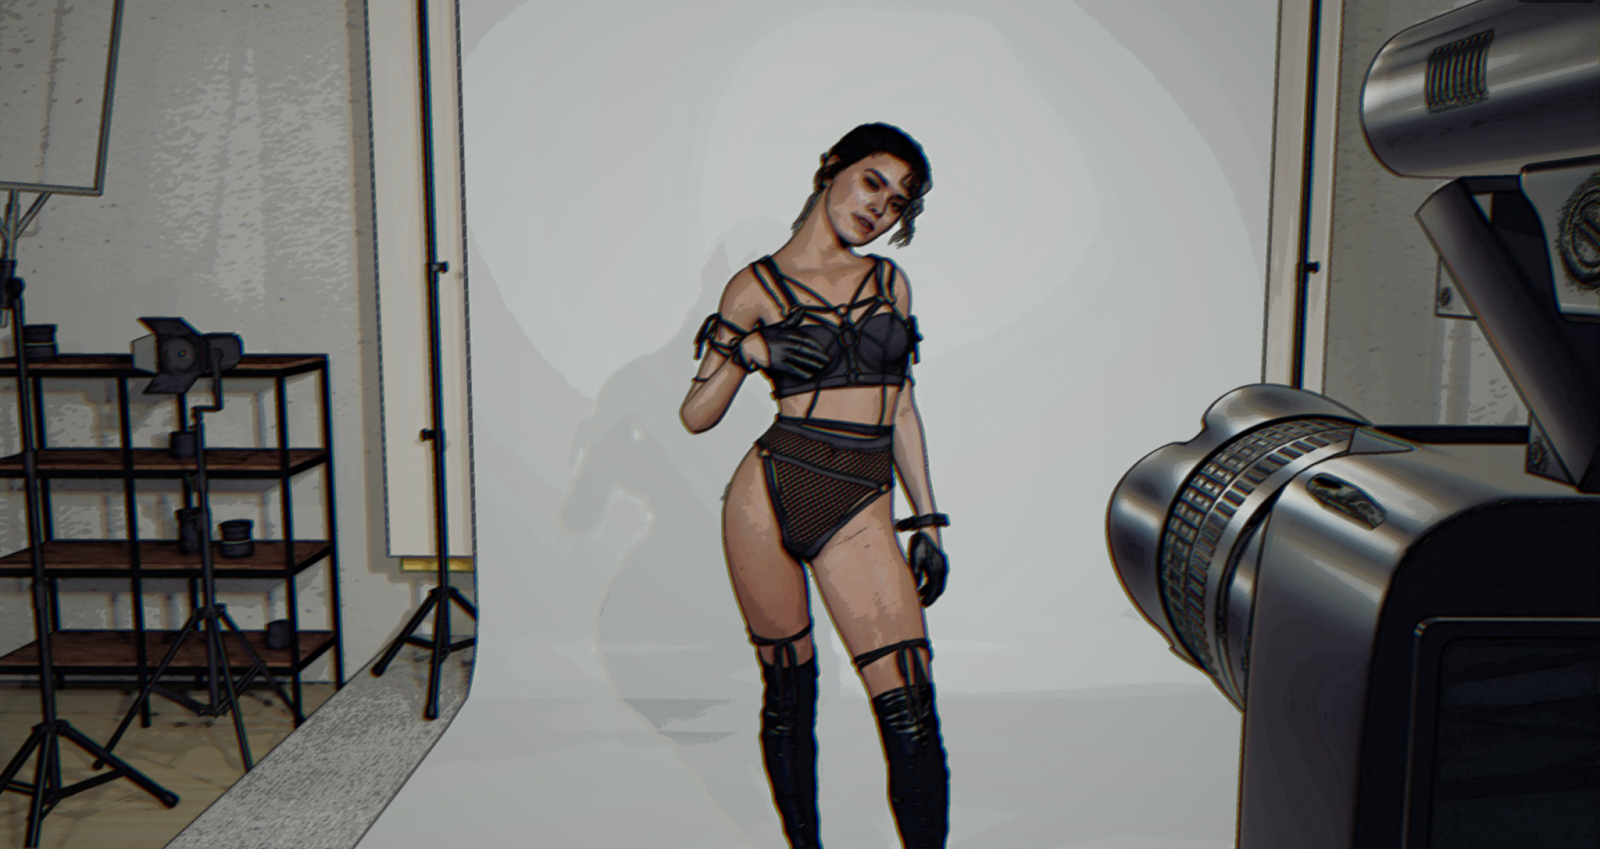
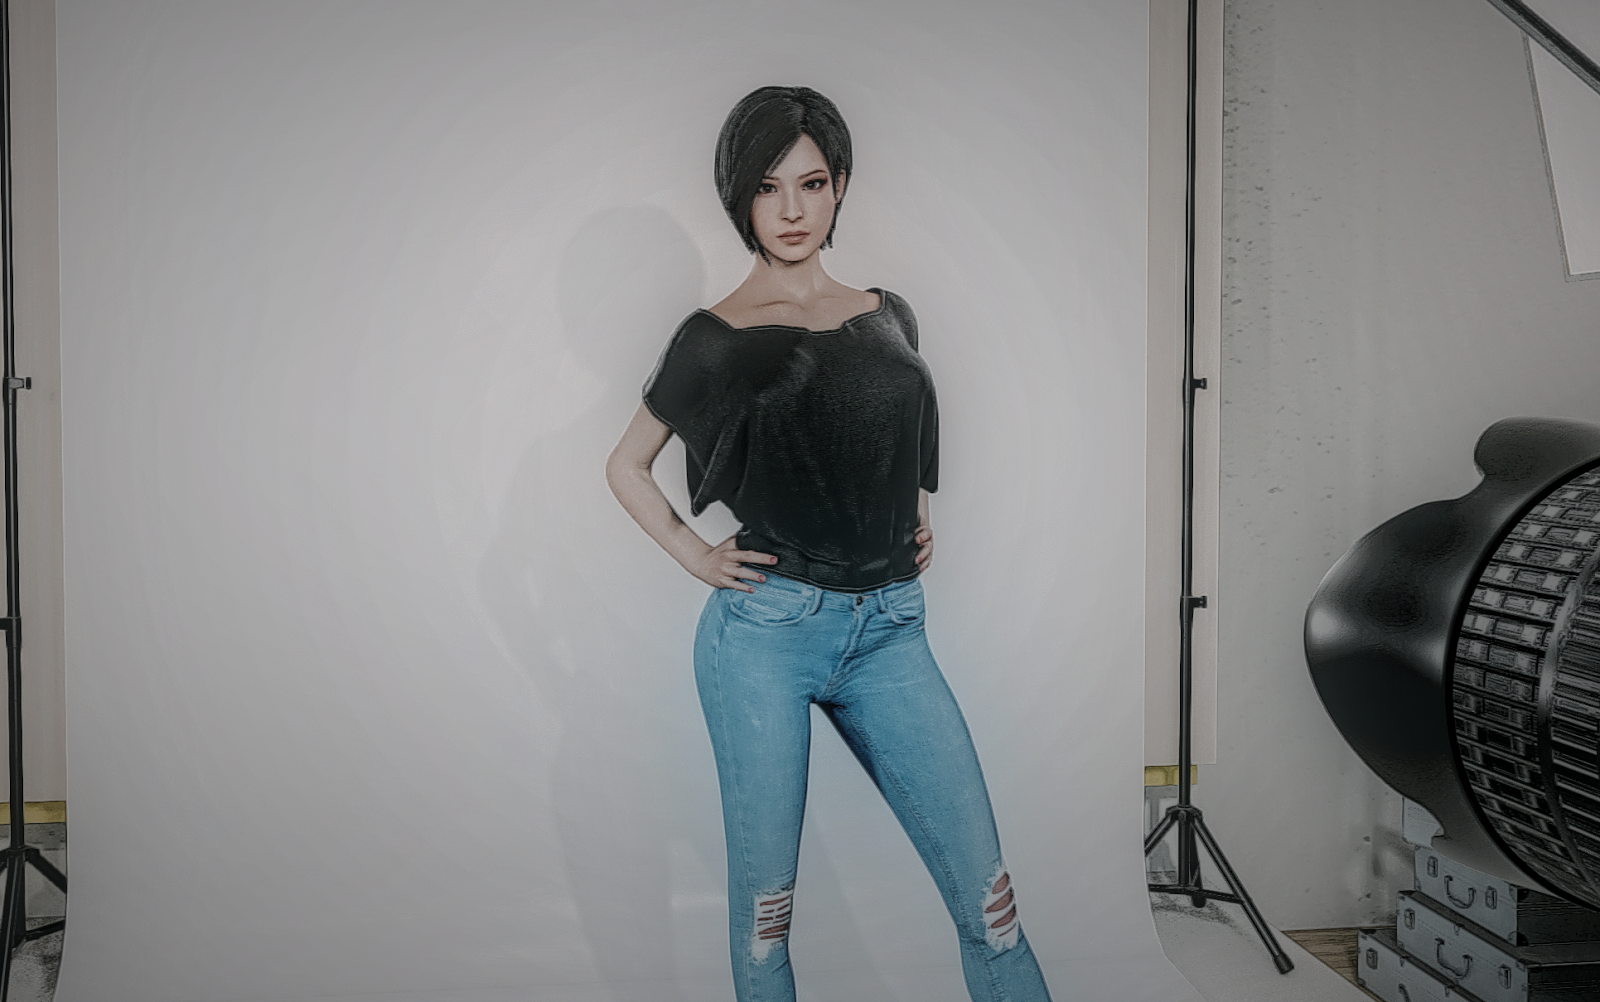
Gallery
Introduction
This guide will help you set up ReShade with your VaM install. I will only be discussing ReShade for desktop use as I haven’t tried it with VR. I will include a few of my favorite presets if you want to attain the looks in the pictures included at the end of the guide. Please bear in mind I made these presets on an OLED monitor in HDR so your results may vary, although it should still look good. ReShade presets are all about tweaking to your preferences so most presets probably won’t be perfect for you out of the box.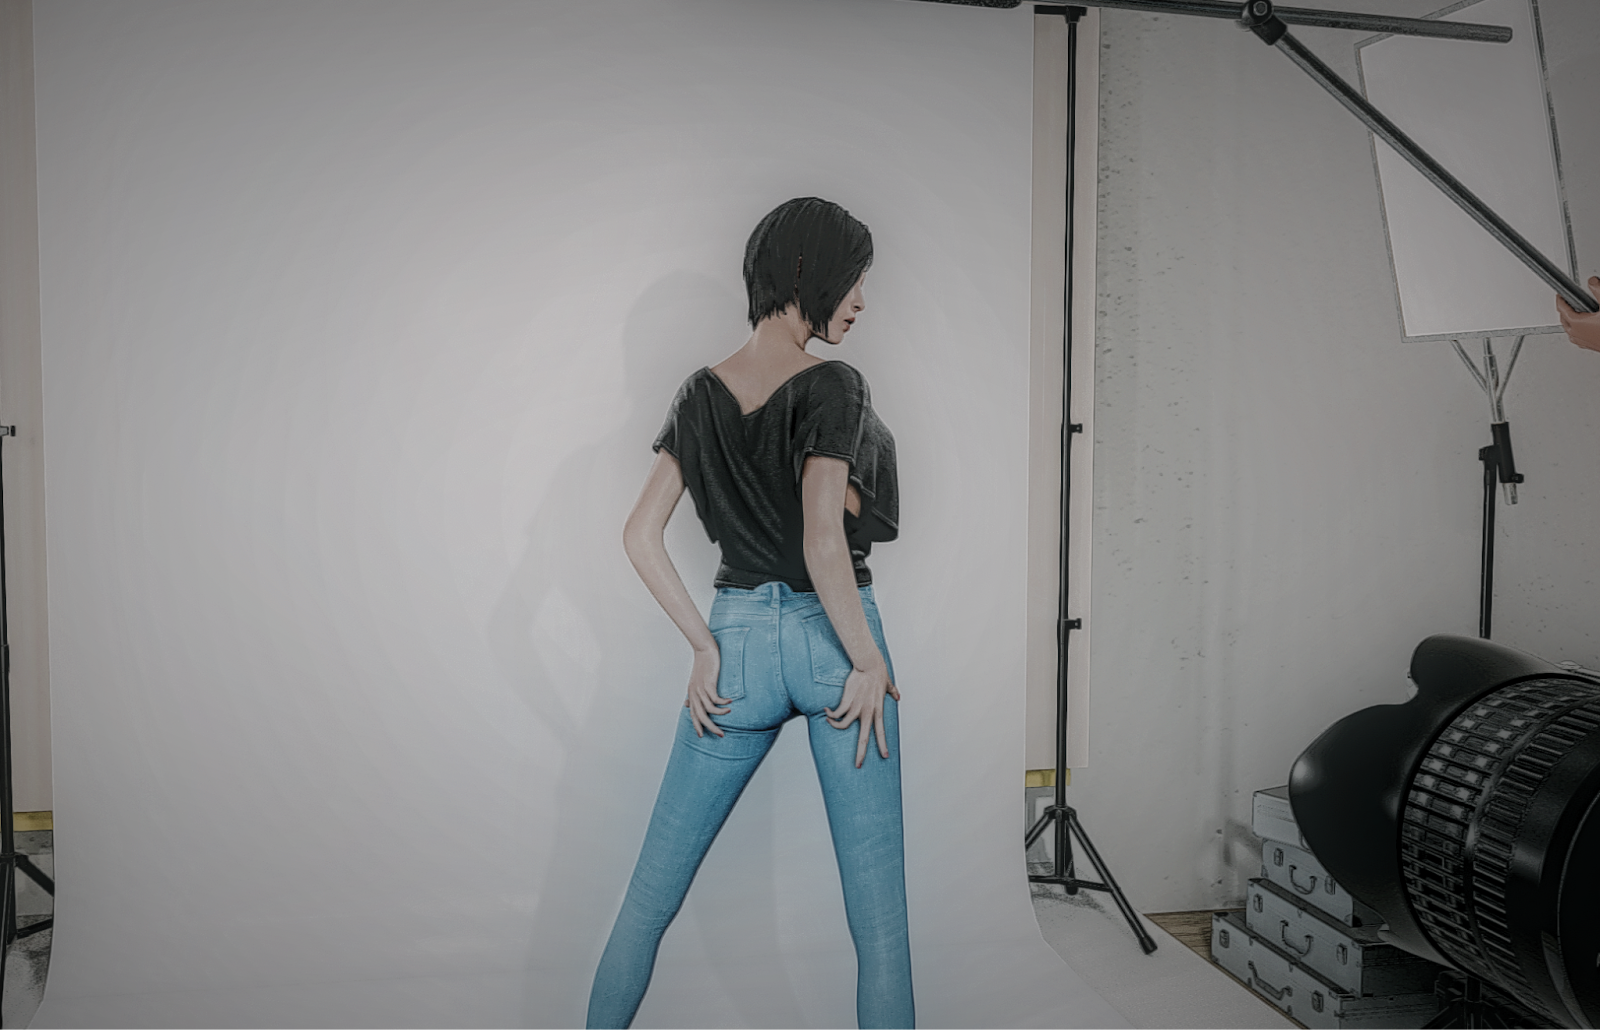
VaM Complete RT 2 Preset
Step 1
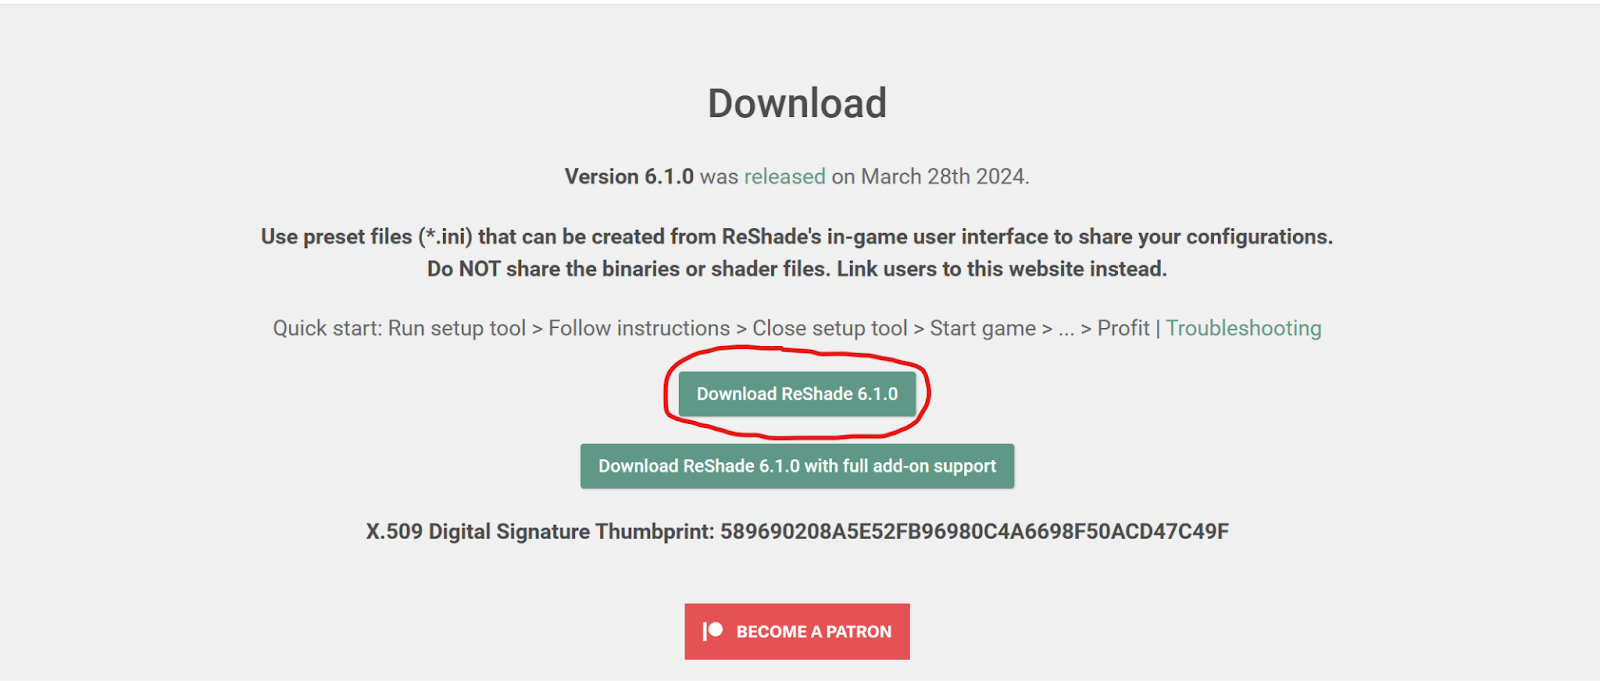
Go to the ReShade website in the link below and click on Download ReShade 6.1.0Home (reshade.me)
Step 2
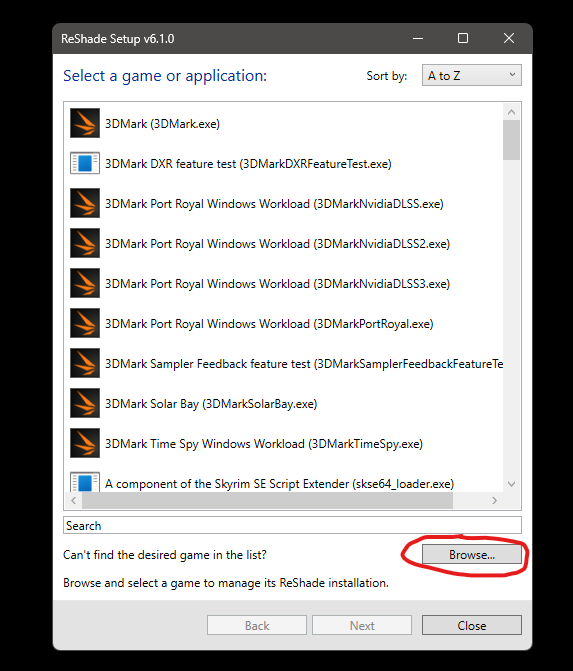
Once you have completed the download, open up the setup application and you will be greeted by the following window. VaM will probably not show up in this list by default so click on the browse button.
Step 3
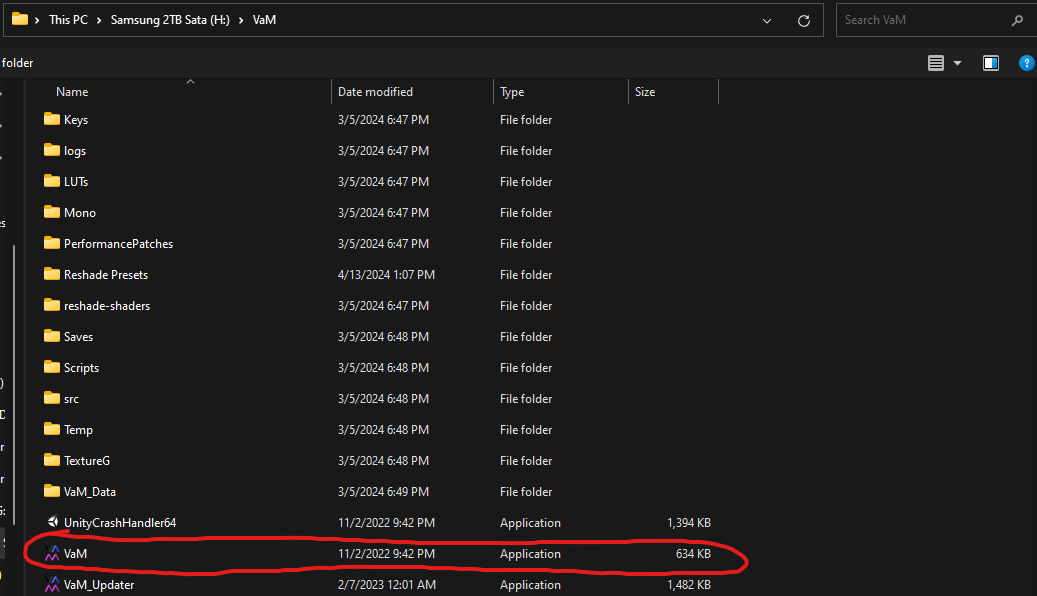
After clicking on the browse button, go to where your VaM directory is and click on the main application exe. Mine is on a secondary drive but yours may be different.
Step 4
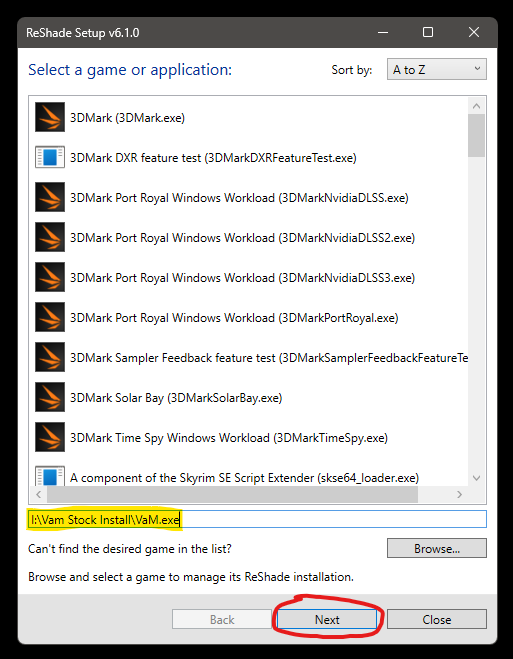
Once you have found your VaM application, click on it and it will now show the file path at the bottom of the window. Click next once you are ready.
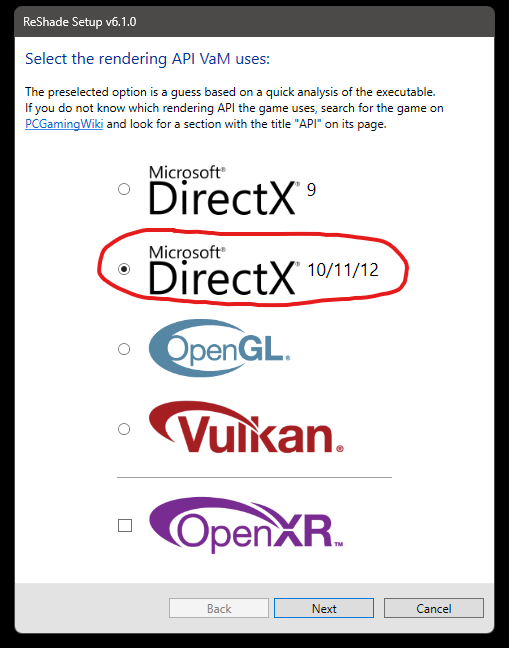
Step 5
You will then be asked which API you want to use. For the purpose of this guide we will be going with DirectX 10/11/12.
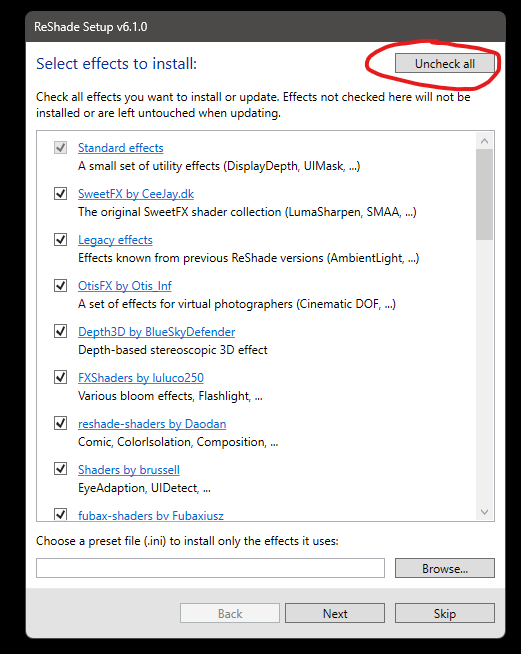
Step 6
You will be asked which effects you want to install. Click on the check all button at the top right of the window and make sure all the effects are selected below, then click next.
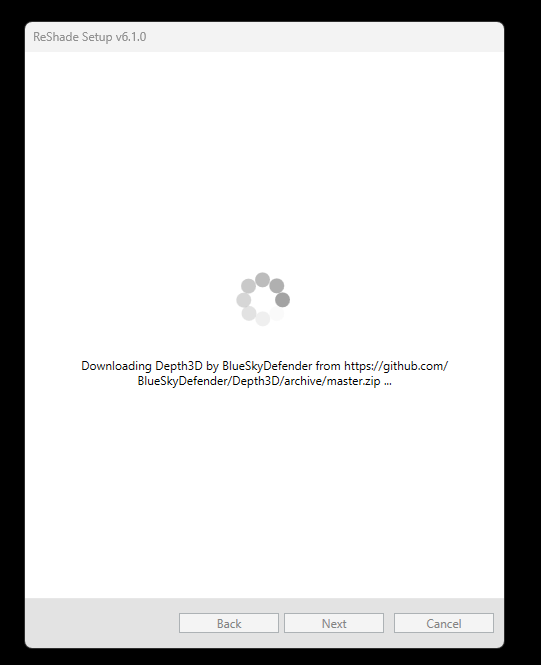
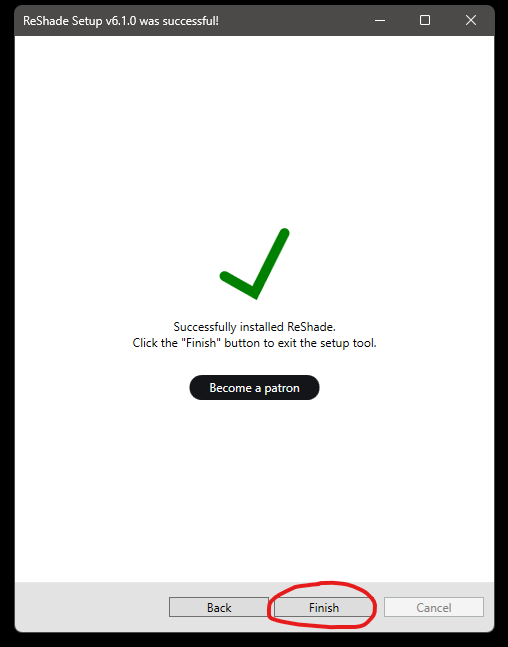
Step 7
Next, you will see all the effects being installed and you will get a Successfully installed screen when it is finished. You may click on finish to complete the installation process.
Step 8
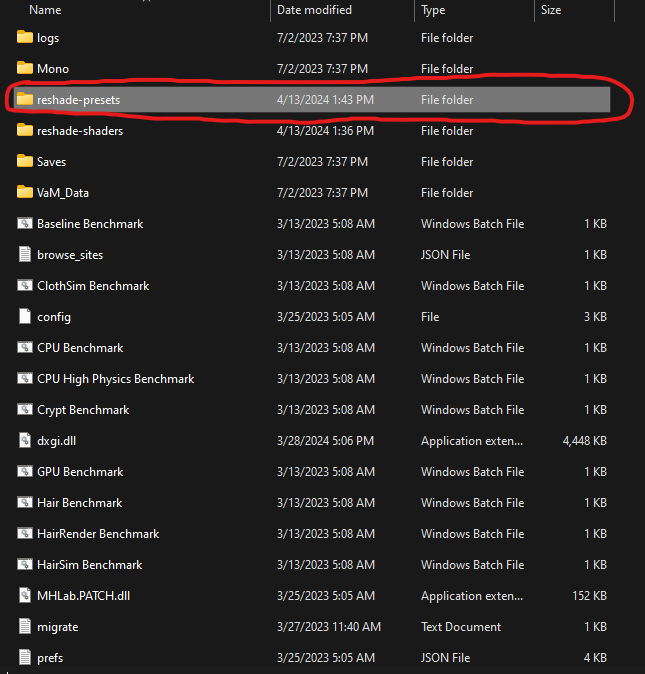
Now, go back to your VaM directory and you should see ReShade folders and files. Create a new folder named reshade-presets. This is where you will place my presets as well as any others you come across or make.
Step 9
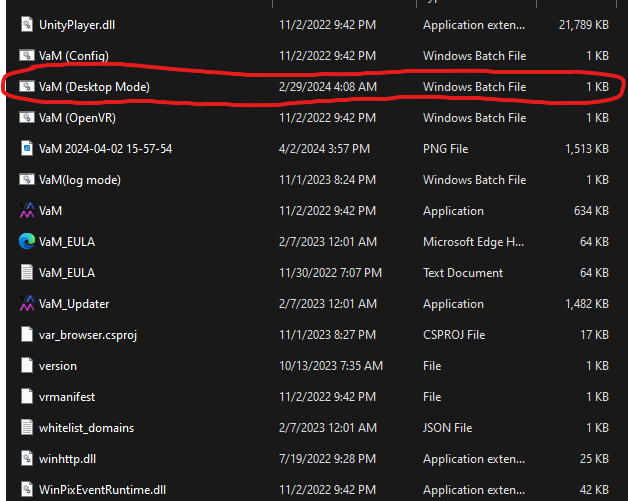
When booting up VaM, make sure you are using the Desktop Mode batch file in your directory to make sure you aren’t leaving any performance on the table. If you want to quickly disable ReShade without uninstalling anything I recommend moving the “dxgi.dll” file temporarily out of your VaM directory. Doing so won’t allow ReShade to load up when you want to use VR.
Step 10
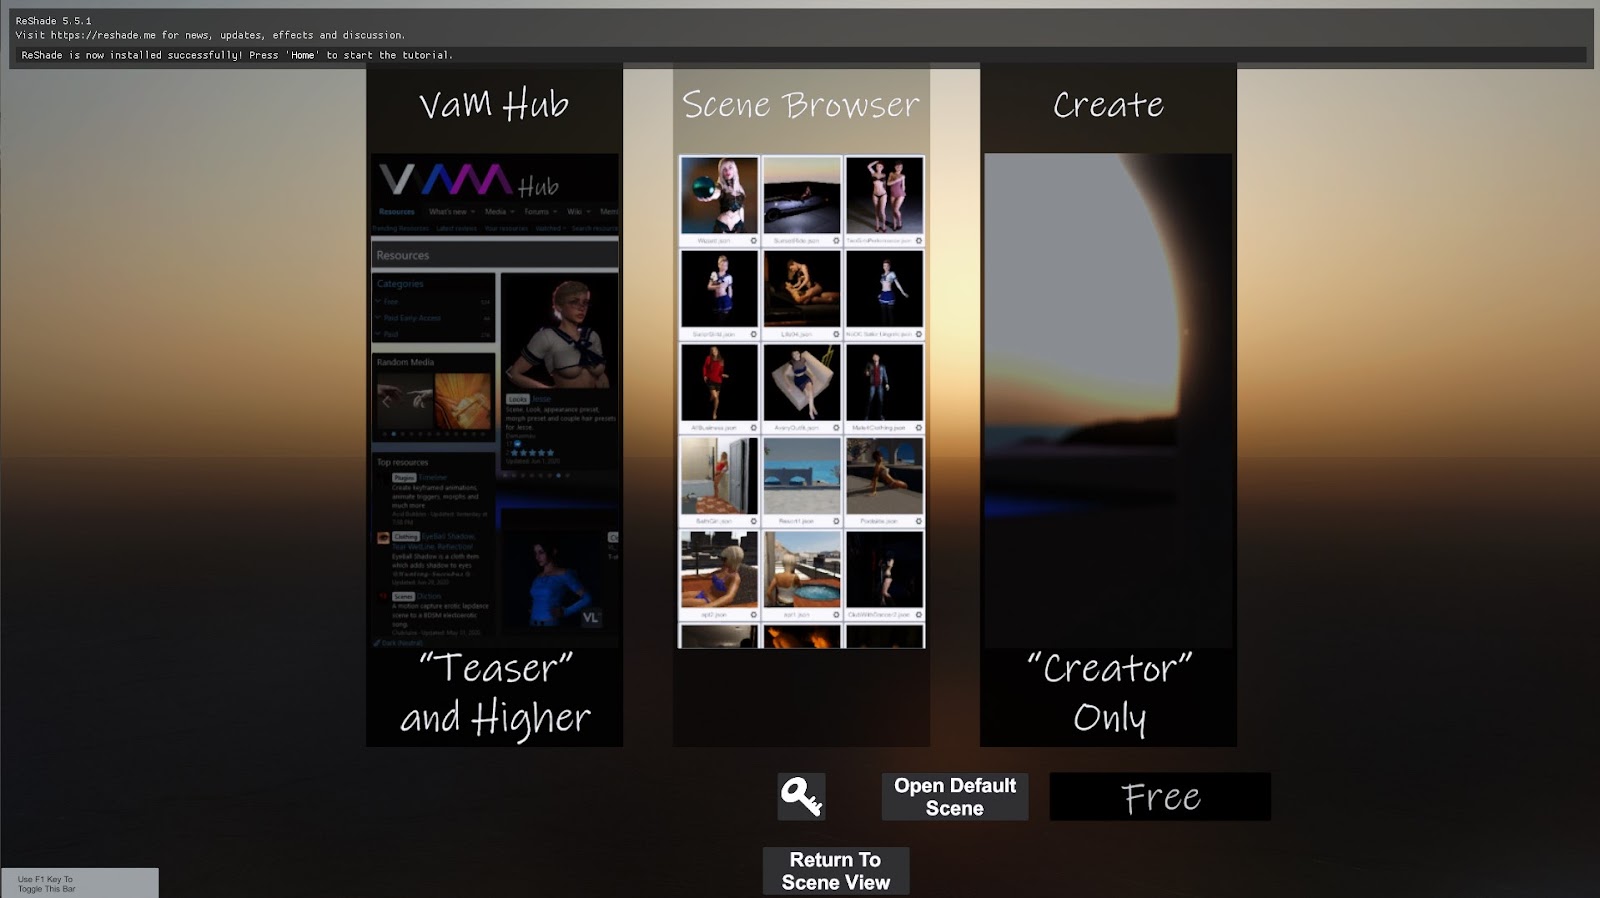
When you boot up VaM you should see ReShade loading in at the top. This can take a bit of time as there are a lot of effects to load in. Once you are at the main menu, press the “Home” key to start the tutorial.
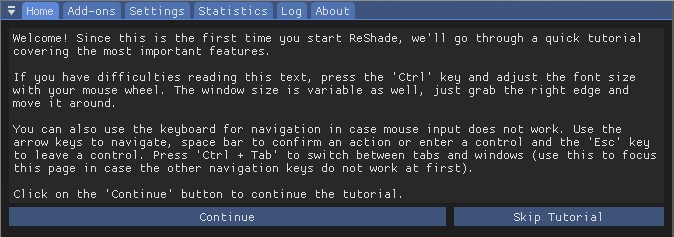
Step 11
From here, you can follow the ReShade built-in tutorial or skip it to start messing around with things.
Step 12
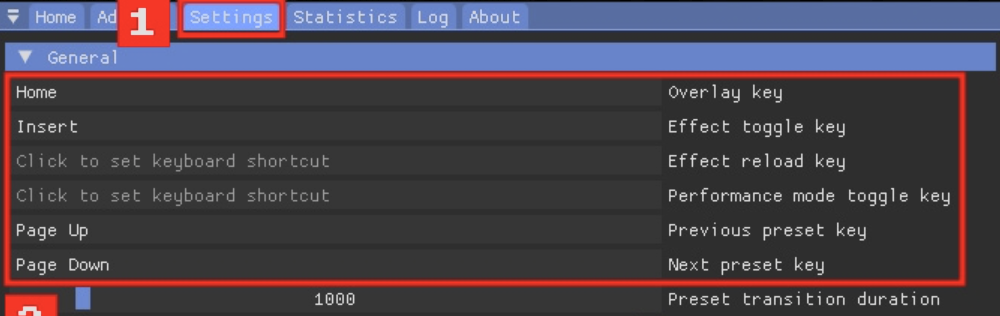
At this point, you will be able to use basic effects in ReShade. This should work ok with my non-RT presets but I do recommend finishing this guide to learn how to fully utilize those presets as well. Before that though, I would advise going to the settings tab at the top and assign the “Effect toggle key” to the “insert” key. You may also assign the “page up/down” keys to switch between presets if you want.
Ray Tracing and Depth Buffer
Ray Tracing in VaM?
In this part of the guide I will explain how to fully utilize my presets that have ray tracing added. To me, this is when VaM is looking its best without editing them after the fact or using supershot. I don’t particularly care for those as I want VaM to look as good as possible in real-time, even if performance is reduced a bit. I will leave my specs at the end of this guide to give you an idea of how I am able to achieve playable frame rates with these effects as they can be taxing, but I am also pretty dumb so you may be able to do better by tweaking these presets or experimenting with effects yourself.Now, do understand that this form of ray tracing isn’t on the same scale as Cyberpunk as it isn’t using engine data and can only use data that is currently viewed in your window or “screen space” if you will. I found this video below explains pretty well how it works. Regardless, it can still look pretty good in most cases and new updates to these RTGI effects improve the performance and speed.
Reshade RTGI vs 'real' Ray-Traced GI (youtube.com)
Before we discuss more about RTGI though, you will need to get the Depth Buffer corrected. The steps shown below should help you get it set correctly. I have also included my settings for you to try, but please understand this step can take a bit of trial and error. You may need to disable MSAA in your graphics settings temporarily but don’t worry as you can enable it again afterwards as MSAA usually doesn’t have an issue with Reshade anymore. The video linked above can also help with this step as it’s probably the hardest step in my opinion.
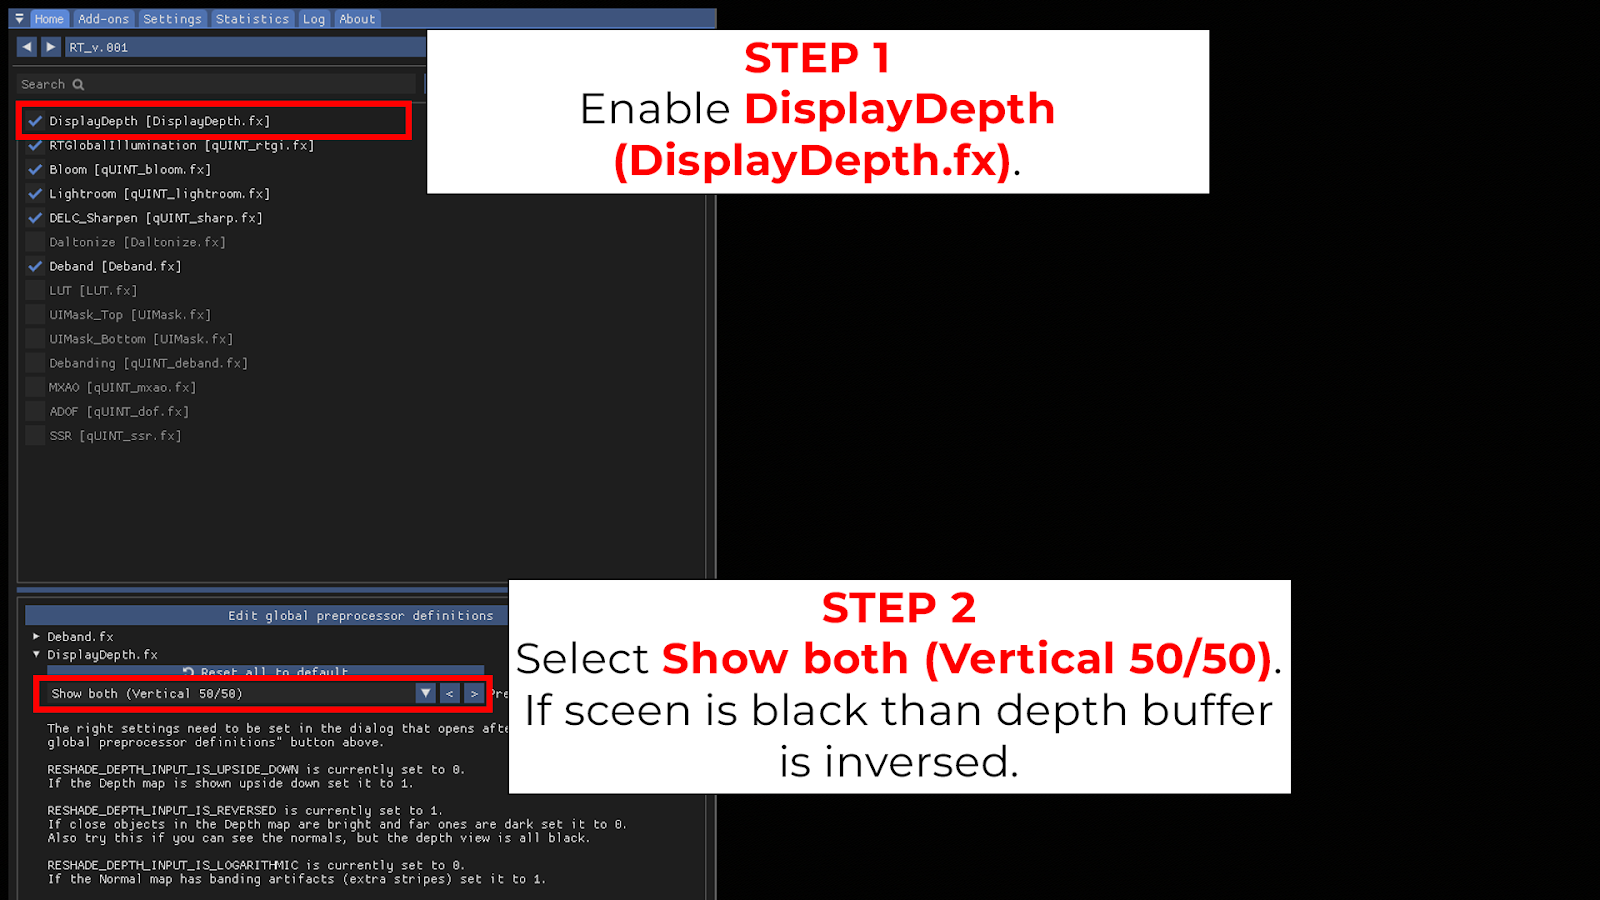
Achieving the depth buffer can differ from game to game, but in VaM it is reliant on the depth of field effect. You may use something like Post Magic with its built in DoF effect but I prefer to use CheesyDoF and it is bound to the F8 key and doesn’t conflict with scenes that might have post magic included. All you need to do is turn on the depth of field effect for 5-10 seconds, which should allow Reshade to read the depth buffer for VaM. I will show my Session Plugin list at the end of the guide in case anyone wants to use it. Once you have done that, try following the steps below.
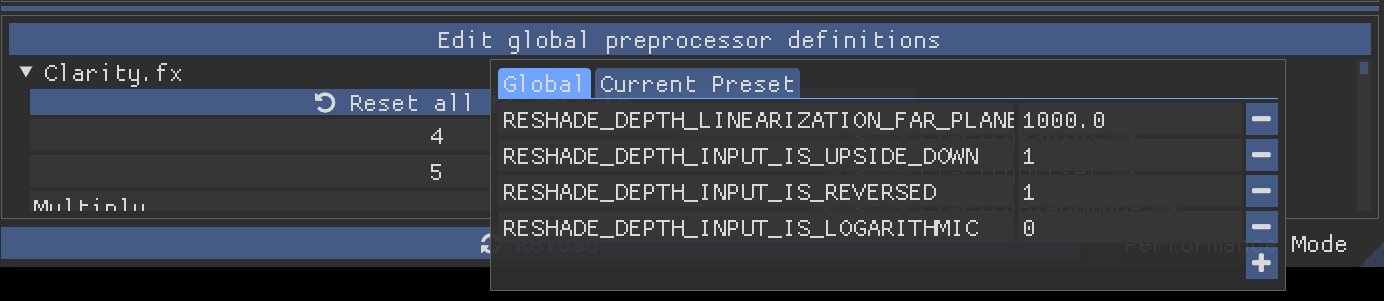
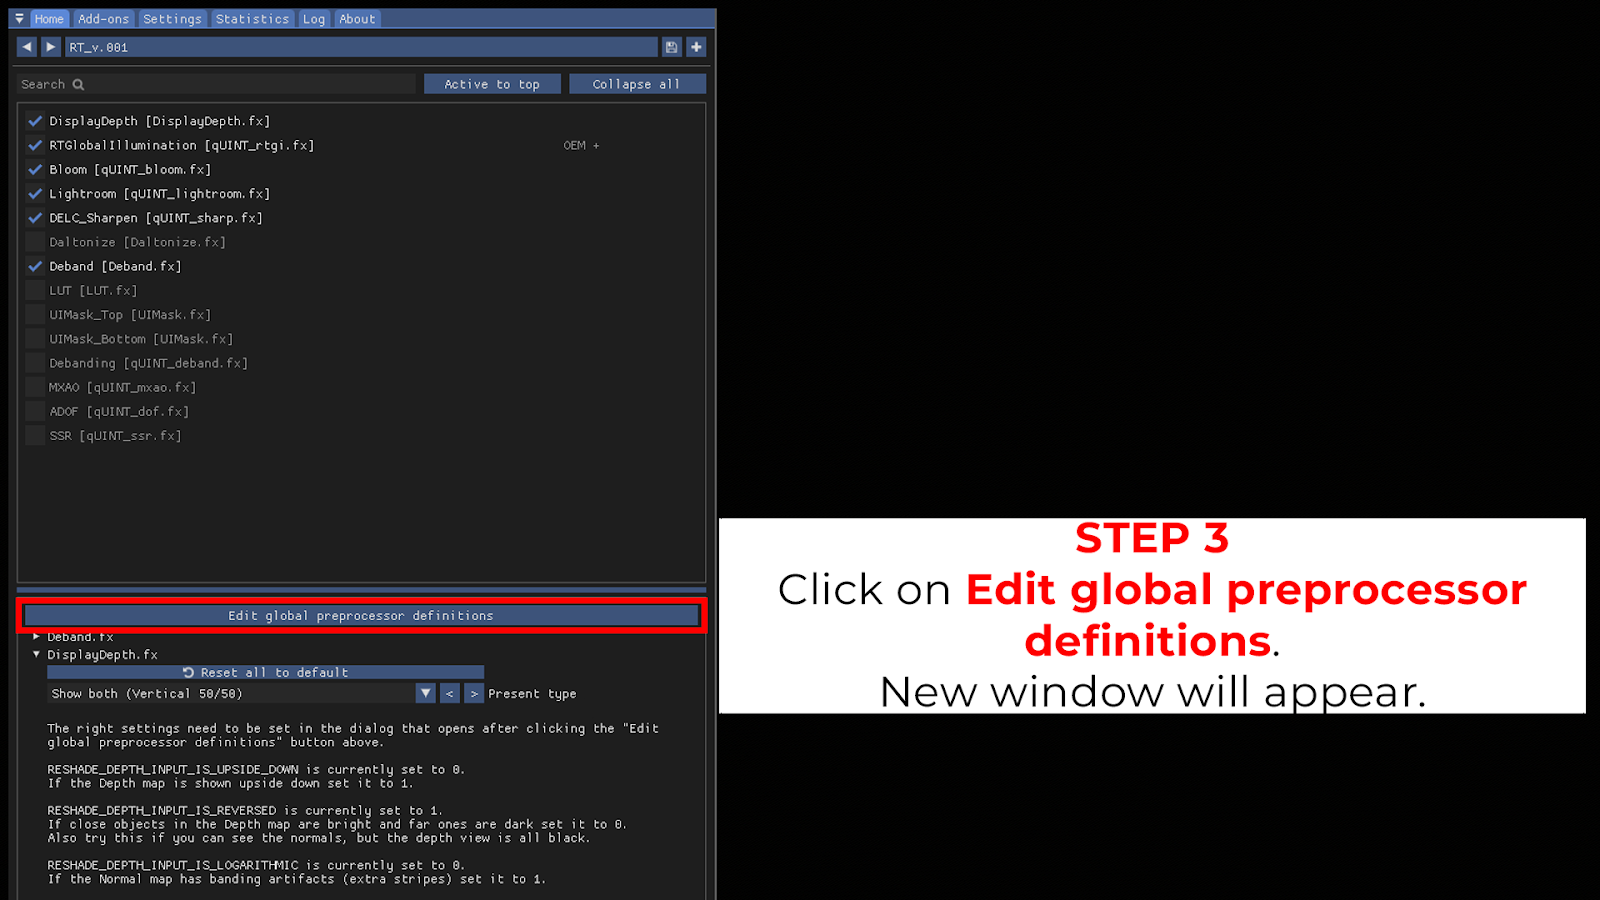
The steps shown below should help explain further. Ideally, you will want your game to look like step 5 and 6, which will show your model in the background. If you only see gray/blue as shown in step 4, the depth buffer isn’t set up correctly and RTGI/MXAO won’t work.
RTGI Add-ons
Now that you have set up your depth buffer, it’s time to add RTGI to VaM. Unfortunately, these are paid addons but I will link their patreon pages below. If you want the full look that you see in all of the screenshots in the guide, you will need both RTGI implementations from NiceGuy and Marty McFly as my presets use effects from both. For the RTGI effect, we will only be using NiceGuy’s Complete RT as I find it looks just as good as Marty’s version, but actually runs a bit faster. A few Marty effects are non-RTGI related so they won’t conflict. You may be able to get away with only using NiceGuy and the free Marty effects on GitHub but it may end up looking slightly different.
NiceGuy | The Developer of NiceGuy Shaders and COMPLETE Shaders | Patreon
Pascal Gilcher | Creating the ReShade Ray Tracing shader (RTGI) and more | Patreon
GitHub - martymcmodding/METEOR: Marty's Extra Effects for ReShade
Once you have downloaded the files, it should be an easy drop-in to your already existing Reshade files in your VaM directory. Be on the lookout for duplicates as having two of the same effect in ReShade will cause it to show up twice in your effect list and will apply the effect twice which isn’t what we want.
That’s all! If your ReShade preset list matches mine shown below, you should be good to go. If the depth buffer is working correctly, you will see a major difference in the shadows compared to default. Some effects work without the depth buffer so don’t assume everything is working just because some effects are. To finish up, I will post the preset lists, my go-to session plugins, my PC specs and a gallery of the presets in action. I know this guide isn’t perfect and may need some tuning but hopefully it will help you get things set up mostly.
ReShade Preset Lists
Session Plugins
Settings for Stopper Light Options
Links for plugins
(294) Plugins - CUAManager | Virt-A-Mate Hub (virtamate.com)
(294) Plugins - Light Options | Virt-A-Mate Hub (virtamate.com)
(294) Plugins - CUA Superglue | Virt-A-Mate Hub (virtamate.com)
(293) Plugins - FocusOnMe! | Virt-A-Mate Hub (virtamate.com)
(293) Plugins - ScreenTools | Virt-A-Mate Hub (virtamate.com)
PC Specs
CPU - Ryzen 7 5800X3D
GPU - RTX 4090
RAM - 64GB DDR4 3600MHz
Monitor - Alienware AW3423DWF
Gallery


